Thursday, June 20, 2013

Veggie Dogs

Hot dogs do not make for the healthiest meal. They're filled with a lot of random crap and are also really high in sodium. We usually buy chicken or turkey hot dogs but they're still not that great, unless you get the nitrate/nitrite-free ones which are much more expensive. But we like hot dogs and we have a lot of canned baked beans (from the days when we had far less time and made less from-scratch meals), so I thought maybe veggie hot dogs might be a healthier way to go.

Since I forgot to take a picture of our package, here's the source

I hoped these Lightlife Smart Dogs would be the answer. When we broke open the package, there was a pretty strong smoky aroma, so I thought these would be flavorful. Once we were done boiling them, we tried them, and they had such a spongy texture. Nothing like real hot dogs. They also had this really odd flavor that we can't quite describe. We dumped the pieces into our baked beans (our non-vegetarian baked beans that had brown sugar and bacon in them) and let them stew on the stove for a bit, but they were still terrible and tasted weird. Only adding a plentiful amount of mustard helped mask the odd flavor.

Veggie hot dog pieces and baked beans

Reading over some reviews, it appears that some people do like these Smart Dogs, and that they don't boil them like we did. We boil all of our hot dogs when we make them for a quick dinner, so we figured these would be the same. Apparently they're better grilled, or pan fried, or loaded with lots of seasonings and/or toppings, so they pick up the flavor of whatever they're cooked or served in. However, even doing that, I can't imagine that these are even close to the same as meat hot dogs (even chicken or turkey). I appreciate that someone is trying to make healthier vegetarian hot dogs, but I don't think we'll be getting these again.

Wednesday, June 19, 2013

Tsujita LA

On our recent trip to LA, there was one restaurant that we knew we really wanted to get to. Tsujita LA is a Japanese noodle shop that specializes in a lesser known style of noodle called tsukumen. They have ramen and other dishes, but it's for those noodles that most people go to them (even though the tsukumen is only available at lunch). For fans of ramen, the difference is that the noodles come cool and dry in the bowl. A warm "dipping sauce" is brought out separately, and you dip the noodles into the sauce before slurping them down. 

Char Siu Tsukumen

I opted for the char siu tsukumen which is the basic noodle topped with roast pork. It's the same roast pork you'd find in ramen or Chinese restaurants. M got the ajitama, which was the same as my order but without the roast pork. We weren't really sure what to expect before the noodles came out. Our expectations were of a small amount of noodles similar to what you might get in ramen. But no, the whole bowl was filled with noodles. In the end that wasn't a bad thing since the meal overall was delicious and you got more for the money, but with our plan to eat "two small lunches" this day (more on this when we get to "part two"), we weren't starting off very well. The noodles were thicker than ramen noodles, and they were chewier as well. They had a wonderful bite to them, and they really held the dipping sauce well.

Tsukumen Dipping Sauce

The sauce itself is extremely rich, thick, and salty when tasted on its own, but with the noodles it's perfect. We each got an egg in ours because of the type of tsukumen we ordered, and it was a nice, solid egg white portion with a slightly runny yolk in the middle. It was cooked just the way I like it, but it's not really M's thing. She gave me most of her egg after she ate a little. The sauce is started as a base by boiling berkshire pork bones for at least half a day and is filled with pork pieces, pickled radishes, and scallions. The first bite I had was transcendent. The noodles, because they're cool and chewy, pick up the dipping sauce like it was glue. The saltiness of the dipping sauce is mitigated by the noodle, but the danger is that if you dip too much then it could be a bit too salty. There's a balance that you need to find between dipping too much and dipping not enough.

They explain that tsukumen is meant to be eaten in 3 stages with the first two involving the noodles: dip straight for the first 1/3, add a squeeze of lime for the rest of the noodles. Perhaps we didn't put in enough lime, but we didn't taste much difference with the added lime. (There are also a lot of condiments on the table that you can add to the tsukemen, especially these spicy mustard leaves that were quite hot and tasty.)

Spicy Tuna Don

Before we saw just how big these bowls of noodles were going to be, we also opted to turn my tsukumen into a combo meal with a side order of spicy tuna don added on. The spicy tuna was really tasty. It was nice to get a larger scoop as opposed to just tasting the bit you would get rolled into sushi. M and I agreed that it was a nice break in between the heavier tsukumen. We definitely didn't need it based upon how much food we ended up eating, but it was certainly a very tasty dish. The rice was perfectly soft and sticky and the spicy tuna had great flavor.

Full spread of food

Stage 3 of Tsukumen

So, the third stage of eating tsukumen that I noted above is the "soup" stage. It's optional, but we recommend it if you have the room left in your stomach. They take your remaining dipping sauce and add hot water/broth to thin it out a bit. It's still a touch salty, but it's that good saltiness. Any pork pieces and radishes left over after the noodles are gone add texture and depth to the soup. If you weren't already full after downing a bowl of noodles, you would certainly be full once you finished the soup.

We had a very enjoyable lunch at Tsujita and it was a perfect start to our LA eating adventures. M's favorite part was the texture of the noodles and mine was the dipping sauce. On top of all that delicious food, we sat outside, it was 75 degrees and sunny, and we got to people-watch, which we really like. It was a great meal.

Tuesday, June 18, 2013

Victory Garden

We ate a lot of ice cream this weekend, in part because of Foursquare's Game of Cones promotion. One place we knew we wanted to go was Victory Garden in the West Village (and not just because their badge was called "House Victory").


Victory Garden is unique because the ice cream they offer is goat milk soft serve made with local goat milk. We definitely wanted to try it to see if the goat milk made a difference. 


There were 4 flavors available when we went: tangy goat milk, salted caramel, chocolate victory and mastic dream. We sampled the salted caramel and the chocolate victory, and ultimately decided to go with the chocolate victory.


The chocolate victory flavor was made with Mexican stoneground and Valrhona cocoa. The ice cream was really great in that it wasn't overly sweetened. They stuck mostly to the natural flavors of cocoa which is getting more and more common these days. Victory's ice cream was really light, smooth, and creamy. The goat milk must give it that unique texture. There was also a light goat milk aftertaste, but it was pleasant.


Victory Garden's ice cream was perfect for a humid summer afternoon. We definitely didn't feel as weighed down or heavy as we did from all the other ice cream this weekend, so the goat milk must make a difference. We will definitely return to Victory Garden!

Monday, June 10, 2013

Inner Peas

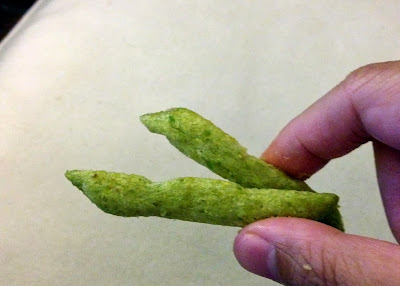
I braved the pouring rain to go to Trader Joe's today to pick up some veggies and cheese, and during my slow perusal of the aisles I saw one of the Fearless Flyer signs promoting something called "Inner Peas." I don't know how long this has been in the store, but I don't remember seeing it on my past few visits or further back when I picked up the kale chips (that we didn't like very much). The name amused me, and the snacks looked like something we might enjoy. Kind of like a snack version of the green bean fries at TGI Friday's, but baked instead of fried. 

Have you found Inner Peas? (ha ha)

We broke open the bag today after dinner since we were looking for a snack. I guess we're purists, since we ate them right out of the bag. And finished the entire bag. That wasn't intentional, but at least eating the entire bag isn't as unhealthy as other snacks might be (less than 500 calories for the entire thing).

Back of the bag

The Inner Peas snacks are very light and crispy and they definitely taste like green peas (which are the first ingredient). We liked that they weren't overly salty, just a little hint of salt, and weren't greasy at all. From some googling, it seems that there was a previous version of Inner Peas that was disliked because it was more cornmeal than pea, but that is definitely not an issue here. These are deliciously addictive and they're so light that you don't feel too guilty or gross afterwards.


Would we get these again? Absolutely. They're $1.49, so not too expensive for a tasty and fun snack. Love Inner Peas!

Black Bean Chicken

One of my favorite parts of cookbooks are the photos. If a recipe doesn't have a photo, I probably won't notice it or read it until I've flipped through the book a few times. I fully admit that half the time I choose recipes to try because the photos look good. That was the case with the black bean chicken (dou chi ji ding / 豆豉雞丁). That photo made the dish look mouthwateringly delicious and it was the first recipe I chose for our second Every Grain of Rice dinner.

Ingredients

We had most of the pantry ingredients on hand, and just needed to pick up some dark soy sauce and Shaoxing wine. Our pantry went from having only a couple of Chinese ingredients a few months ago to being almost fully stocked!

Some of the ingredients from the first trial. Noticeably missing from this collage? Black beans and chicken...

The main ingredients for the recipe were:

- 2 boneless chicken thighs (I used chicken breasts, $2)
- 1 green bell pepper (I forgot to get this the first time so I used red, $0.75; $1.15 for the green)
- 3 garlic cloves ($0.05)
- Equivalent amount of ginger ($0.05)
- 2 tbsp fermented black beans ($0.10)
- 1-2 tsp ground chillies ($0.05)
- 2 tbsp finely sliced spring onion greens ($0.20)
- 1 tsp sesame oil ($0)
- Salt ($0)
- Cooking oil ($0)

Ingredients ready to go for the second cooking

There were also separate ingredients for the marinade:

- Shaoxing wine ($0.10)
- Salt ($0)
- Potato flour ($0.05)
- Light soy sauce ($0.10)
- Dark soy sauce ($0.10)

The cost here really comes from the chicken and the peppers, but the dish still costs under $5. I thought it would be more, so I was pleasantly surprised when I did the math. I'm sure some of the savings is from buying the giant bag of Costco frozen chicken instead of getting the chicken fresh.

Process

Step 1:  Cut chicken into cubes. Make marinade for chicken. Mix chicken with marinade.


Step 2:  Lots of other prep to do: Cut peppers into small squares to match chicken size. Peel and slice garlic and ginger (having tried it both ways, I prefer to finely chop both of these instead of using slices). Rinse and drain black beans. Measure out spices because there won't be time to do it later when cooking. Finely slice spring onions.

Step 3:  In a wok over high flame, heat cooking oil, stir fry peppers until slightly cooked, and then remove and set aside peppers. [My green peppers are a little blistered and ugly; I guess I didn't use enough oil? This did not happen with the red peppers the first time.]


Step 4:  Reheat wok over high flame. Add oil, then stir fry chicken. Add other ingredients in the following order, giving each some time to cook: garlic + ginger, black beans, ground chillies, peppers.

Step 5:  Stir fry until everything is "sizzingly delicious." Season with salt to taste. [I forgot about the salt last time. It didn't need it.]

Step 6:  Stir in spring onions. Remove from heat and add sesame oil.

Review

Black bean chicken #1

The black bean chicken is probably tied for my favorite recipe from Every Grain of Rice alongside the ma po tofu. The black beans just add this flavorful earthiness that I really love. I guess it's not surprising that it's in both dishes that are my favorites.

Black bean chicken #2

The recipe came out a little differently each time with the different types of peppers. I also think you could add in all sorts of vegetables (mushrooms, onions, etc) instead of or in addition to peppers, and have a good meal. The second time I made this, we didn't do it as part of a trio of dishes, but instead had it stand on its own, which it did quite well. I can't wait to make this again!

Sunday, June 9, 2013

Bahamas

WorldEats Country #2: Bahamas (skipped)

Cruise ship stop in Nassau, 2005

Moving south from Canada (and of course, skipping the USA), the next country on our list was the Bahamas. A and I had been to the Bahamas on a cruise together back in 2005, visiting Freeport and Nassau, and I had also gone to Nassau with my family once before. 

We haven't had much exposure in our lives to Bahamian cuisine, but usually when I hear "Bahamas" and think about food, what comes to mind are conch and grouper. We had conch fritters in Freeport and saw lots of street vendors selling them in Nassau. They smelled really good and were pretty tasty, from what I can remember. (Why we have no pictures, I have no idea.) I think there was grouper on the menu on one of the cruises for dinner on the night we left the Bahamas, which was nice but I don't have much memory of it since it was about 10 years ago.  Some internet research tells me that we are correct on conch and grouper being popular in the Bahamas, but that there is also spiny lobster and other dishes that are commonplace there.

Restaurant selling conch in Freeport, 2005 (Picture of the sign but not the fritters...)

I spent a long time looking for Bahamian cuisine in the New York area (or even just Bahamian style conch fritters) but have completely failed at finding anything. Apparently there used to be a Caribbean festival in the fall that would have some Bahamian dishes but I didn't see any notice of the festival last year. After that, the only thing in the area is the chain Bahama Breeze, but we've been to Bahama Breeze before (in Illinois) and that's less Bahamian cuisine and more "island grille" (their menu says their conch fritters are Key West-inspired and they have Asian rice bowls, so not super authentic).

I did manage to locate 1 or 2 Bahamian restaurants in the US but they are in Florida, which is not exactly close to us. Hopefully if we visit Miami sometime we can drop by and explore the Bahamian section of our WorldEats challenge, but until then (and unless they do have that Caribbean festival this year), it's going to have to wait.

Next stop: Cuba!

Saturday, June 8, 2013

Canada

WorldEats Country #1: Canada

Victoria, 2007

For Canada, the first country in our WorldEats challenge, we sampled several different aspects of Canadian cuisine. We went for some Montreal specialties like smoked meat, bagels and poutine at Mile End Sandwich, and we explored the influence of Asian food in Canada (especially Toronto and Vancouver) by ordering up some Japanese hot dogs at Vancouver-import Japadog.

Timbits in Ontario - we now have these in NYC but they are better in Canada, as is the coffee

Canadian cuisine was a bit tougher to explore than we thought it would be. We weren't able to find any sort of "Canadian restaurant" in our research (Tim Horton's does not count for this purpose and we did not go there for WorldEats as we had previously visited TH's on both sides of the border), so we couldn't just "go out for Canadian food." It took a little more work to identify dishes or types of food that we wanted to try and search them out. Since the country is so large and diverse, it's a little like "American cuisine" in that you have to look for specific things (like BBQ, Southern, Tex-Mex, etc). But in the end we're pretty happy with the results. We tried two places that had been on our list to try for some time and the food was really tasty. I'm sure we'll be back to those spots. After all, we've already made repeat visits for the sake of these posts!

I was looking through my pics for Canadian flags, and this one from Victoria has plenty!

As the recaps of our "official" Canadian exploration come to an end, we saw news yesterday that an Ontario burger chain, Big Smoke Burger, is on its way to NYC, bringing with it all sorts of delicious sounding burgers (I'm quite intrigued by the namesake burger as well as the crazy burger) and our favorite poutine. I guess someday it will be easier to find "Canadian cuisine" here in the city. I'm pretty sure we'll be checking it out when they open!

Stir-Fried Green Soy Beans with Snow Vegetable

When looking for a new vegetable dish to try in Every Grain of Rice, I wanted to work with vegetables that weren't the ones we usually bought. Immediately the stir-fried green soy beans with snow vegetable (xue cai mao dou / 雪菜毛豆) stood out to me, because I wasn't sure if I had ever had snow vegetables. (A, on the other hand, grew up eating them.) The recipe also looked fairly easy, and quick simple recipes are always a good thing to add to one's repertoire.

Ingredients

Since I had never bought snow vegetables before, I had no idea what I was looking for or where in the store it would be. Eventually we found a preserved vegetable section but nothing was labeled "snow vegetables." Luckily I had a photo of the recipe page from the cookbook on my phone and we matched up the characters for "xue cai" (snow vegetable) in order to find this package. For future reference, you can also look for "potherb mustard."

Snow vegetable!

The ingredients for the recipe totaled less than $1.50:

- Green soy beans (fresh or frozen) ($0.98)
- Snow vegetables, finely chopped ($0.25)
- Sesame oil ($0)
- Salt ($0)
- Cooking oil ($0)

Dried chillies and whole Sichuan pepper are optional, but I didn't include those since we haven't really purchased chili peppers before. Instead I just added a little bit of ground chili pepper ($0.10) in their place. Not a perfect substitute in appearance or flavor, but it worked fine.

Process

This was another easy recipe, and the bonus is that it had very, very little prep, so it was also quick.

Step 1:  Defrost the green soy beans if you're using frozen beans. (If you use fresh, you need to cook them at this point instead.)


Step 2:  Finely chop the snow vegetables. (I've chopped them less and less finely as we keep making this, since they shrink so much anyway when cooking.)


Step 3:  In a wok over high flame, add cooking oil and spices (this is where I added the ground chili pepper) and sizzle them until fragrant. Add snow vegetables and stir fry briefly.

Step 4:  Add soy beans and stir fry briefly until hot. Season with salt to taste.

Step 5:  Remove from heat, stir in sesame oil.

Review


This dish was really easy to make and I absolutely loved it. I didn't know what I would think of the snow vegetables, but I really loved their unique sour/pickled flavor.


The only "issue" (not really an issue) with the dish was that all it contained was snow vegetables and soy beans. While tasty, it's not a whole lot of variety. The next time I made it I added lotus root slices since we had purchased more lotus root and I thought maybe it would be a good addition. It tasted fine, but the shapes didn't really match up so well. I think next time maybe I'll add red bell peppers chopped up in small squares. I think that would texturally be a better match.

I really enjoy the soy bean and snow vegetable combination, and will continue to make this. It's quick to prepare and cook, and it's also easy to keep the ingredients on hand since I used the frozen soy beans and the xue cai just sits in a package in the fridge. Even when it's just soy beans and snow vegetables, it's still tasty. Can't wait to make this again!

Mile End Sandwich

In our continuing World Eats quest, M and I continued our trek through Canada by visiting Mile End Sandwich to partake in their Canadian smoked meats and that most Canadian gutbomb, poutine. We visited twice so as to try more food options before we wrote this review, but the two constants were the smoked meat sandwich and the poutine. We did, however, learn valuable lessons about eating here during our first visit that we used in our second visit.

In our first visit we ordered the smoked meat sandwich, the Beauty, and an order of poutine.

Smoked Meat Sandwich

The smoked meat sandwich was the main reason we visited and one of their specialties. It's also a representative dish for Montreal's cuisine. Prior to Hurricane Sandy, Mile End had its own kitchen in which they smoked all of their own meat. The kitchen was damaged and flooded pretty badly, and neither of us is sure if it's back up and running. Such as it is, the smoked meat was amazing. I had never had real pastrami (which Montreal-style smoked meat is most similar to) before moving to NYC, and I've done what I can to eat as much salty, smoky meat as I can to make up for that fact.

Mile End's offering is a little saltier than most pastrami that I've had, but it was still extremely delicious. The meat had the right amount of fattiness and grease to give it a rich, soft texture. The mustard added a bit of spice and sourness to balance out the salt. It was a delicious sandwich and one that we were looking forward to trying again.

The Beauty

The Beauty is a Montreal-style bagel stuffed with lox and cream cheese, red onions, tomato, and capers. From what I could tell, Montreal-style bagels are wonderfully soft and chewy while having a nice bite with the crusty, sesame seed covered exterior. The lox, similar to the smoked meat, was a little on the salty side, but M and I are suckers when it comes to lox and cream cheese on a bagel, and we certainly enjoyed this one. The bagel really makes this menu item special.

 Poutine

Poutine is a Canadian delicacy consisting of french fries covered with cheese curds and then smothered in brown gravy. (You may remember our poutine stop in Saint John, but these were better.) It's a heavy side dish that fills you up. The fries are standard thick cut fries, but adding the squeaky cheese curds and brown gravy made this a dish to remember. As delicious as it was, M and I ran into a serious problem. Now, the issue we had isn't that the poutine tasted bad, it was just too much food. The "side order" is probably enough to feed at least 4 people. Sadly there were just two of us, but we somehow still finished the whole meal.

Fatty feast!

After a few months when we finally digested all of the poutine we had ordered, we decided to go back to refresh our memory on some of the food we tried the first time while also trying something new. We repeated the smoked meat sandwich, but this time we were smart and did the "combo meal" option that came with pickles and a single-person serving size of poutine. We also ordered the chicken salad sandwich as our second dish. For this part of the review, I won't go back into a review of the smoked meat because it was really tasty but also the same as the first time.

Chicken Salad Sandwich

The chicken salad sandwich comes with gribenes (chicken cracklins), pickled peppers, and new pickles all on challah bread. The chicken salad itself was very light. It wasn't heavily laden with mayonnaise like most chicken salads you'll find in regular delis, and the vegetables were very fresh. The gribenes added some crunch to the sandwich as well as a little extra salt. M wasn't a huge fan of the cracklins and thought the sandwich would be better without them, but I disagree. I mean, who doesn't like cracklin?

Manageable Poutine Size

The combo meal for the sandwich comes with a MUCH more shareable size of poutine for two people. It was just as tasty as the monster sized variant we first got, and this one came with pickles! I like pickles a lot so this made me happy. I think as a combo, the poutine is still too much for just one person, but it's a good amount for two people.

Mile End was a restaurant we had wanted to try ever since they opened in 2009, and the opening of Mile End Sandwich which was so much closer made it that much easier for us. It was everything we expected it to be and more, and we're definitely looking forward to our next visit.

Friday, June 7, 2013

Delectable Lotus Root Salad

When we visit family in Brooklyn for dinner, we often get a chicken dish that comes with Toisan vegetables. Included in those vegetables are lotus root and wood ear mushrooms. So when I found a recipe in Every Grain of Rice for a cold dish that included both of those, as well as other vegetables, it piqued my interest. I definitely wanted to try making it, so the delectable lotus root salad (mei wei ou pian / 美味藕片) got added to the dinner menu.

Ingredients

This dish required us to buy some more new ingredients to stock the pantry (dried shrimp, dried wood ear mushrooms, rice wine vinegar), but since those are all re-usable, the dish cost about $3.

Chopped lotus root, dried shrimp, dried wood ear mushroom, red bell peppers and green onions, sesame oil and rice wine vinegar

- 1 tbsp dried shrimp ($0.60)
- A few crinkly pieces of dried wood ear mushroom ($0.40) *
- 1 section of fresh young lotus root ($1.27)
- 1 tsp finely chopped ginger ($0.05)
- 2.5 tsp clear rice vinegar ($0.20)
- 1 tsp sugar ($0)
- A few small horse-ear slices of red bell pepper ($0.25)
- 1 spring onion, green part only, sliced diagonally ($0.20)
- 1 tsp sesame oil ($0)
- Salt ($0)

* The recipe called for a "few" pieces but I used more like seven. They looked so small in their dried form that I didn't realize just how big they would get. I definitely didn't need to use as much as I did.

Process

This was a really straight-forward and easy dish to make. Most of the work is in the prep.

Step 1:  Soak dried shrimp and wood ear mushrooms in hot water for at least 30 minutes. The shrimp don't get much larger, but the wood ears definitely do.

After soaking in hot water for a few minutes

Mushrooms after about half an hour

Step 2:  Prep all the other ingredients - chop the red bell peppers, chop the spring onions, finely chop the ginger, and peel and thinly chop the lotus root.

Step 3:  Place the lotus root slices in boiling water for a minute or two to blanch them soon after cutting them. Refresh in cold water and drain.


Step 4:  Drain wood ears and shrimp. Cut wood ears into small pieces.

Step 5:  Combine all the ingredients together in a bowl and mix well.

Review

First, let me just say that my dish looks nothing like the one in the cookbook, which had mostly lotus root slices with everything else as accents. I guess I used more wood ears, bell peppers and green onions than she did.

Finished lotus root salad

It was a really fresh and clean dish, a little sour from the rice wine vinegar which was very present in the dish, and crunchy from all the lotus root slices. We thought it was healthy and good, but it wasn't really that exciting. Would we make it again? Maybe, since it's very light and refreshing, and we love lotus root!

Every Grain of Rice Preview II

Now that I finally finished recapping our first dinner from the Every Grain of Rice cookbook (see here for smacked cucumbers in garlicky sauce, here for ma po tofu, and here for stir-fried beansprouts with Chinese chives), it's time to tell you about the second set of dishes I've added to our repertoire!

The first time, since I was new to the cookbook, I chose "vegetarian menu 1" out of the suggested menu ideas section. This time I just flipped around until I found recipes that sounded interesting and like they might go together. I tried to pick a similar set of dishes with respect to type - one protein dish, one vegetable dish, and one cold dish - figuring that they would make for a balanced meal.


For our second dinner, we ate:

- Black bean chicken
- Stir-fried green soy beans with snow vegetable
- Delectable lotus root salad

Although I like lotus root a lot, I wasn't thrilled with how the lotus root salad came out. But the other two dishes were delicious and we've made them again since then. Hopefully it won't take two months to recap these dishes! 

Ma Po Tofu

I cooked our first dishes out of the Every Grain of Rice cookbook about two months ago (can't believe it's been that long), so it's long overdue to post the recap of the final dish from that dinner: the vegetarian version of pock-marked old woman's tofu, also known as ma po dou fu (麻婆豆腐).  I love ma po tofu (even if we've only posted about it twice) and really hoped this dish would come out well. 

Ingredients 

Some of these ingredients belonged to the other 2 dishes but I bet you can figure out which ones

- 1 container of plain white tofu ($1.09)
- 5 spring onions, green parts only ($0.30)
- 2.5 tbsp Sichuan chili bean paste ($0.10)
- 1 tbsp fermented black beans ($0.05)
- 2 tsp ground red chillies ($0.05)
- 1 tbsp finely chopped ginger ($0.05)
- 1 tbsp finely chopped garlic ($0.10)
- 1/4 tsp ground white pepper ($0)
- 2 tsp potato flour (mixed with cold water) ($0.05)
- 1/2 tsp ground roasted Sichuan pepper ($0)
- Water ($0)
- Cooking oil ($0)
- Salt ($0)

We bought several of these ingredients new for this dish (the chili bean paste, black beans, chili powder, potato flour) but since they are now stocked in our pantry and we continue to use them in other dishes, I'm only counting the amount we used. (If we weren't finding other uses for them, I would count the whole thing as a sunk cost.) That puts the cost of this tasty dish at around $2. The prices of tofu and spring onions may vary each time, but I don't think the total cost would come out to more than $3.

Process

Once you start cooking, it all goes rather quickly. I took no photos the first time and managed only one pic the second time.

Step 1: Prep everything. This, as usual, took awhile, but not as long as the chives dish. The spring onions needed to be chopped thinly in diagonal slices, the black beans needed to be rinsed, the ginger and garlic had to be finely chopped, the Sichuan peppercorns had to be roasted and ground, the tofu had to be drained and sliced and then placed in hot water to steep. 


The wok at the end of step 2

Step 2: Stir fry everything in a wok over medium flame once the cooking oil is heated. The order is chili bean paste, black beans + ground chillies, ginger + garlic, tofu, water + white pepper + salt. It doesn't all go in at once, but each set of ingredients is allowed to "gently sizzle." You have to be really careful with the tofu, especially since we use the silken kind, since it breaks up a lot.

Step 3: Bring it to a boil, simmer for a few minutes, add the potato flour/water mixture, let it thicken, add spring onions, and "nudge gently" into sauce.

Step 4: Pour into deep bowl and sprinkle with the Sichuan pepper. 

Review

The first ma po tofu 

I loved this dish and thought it came out really well. Many ma po tofu dishes come with meat, and it was great to find a vegetarian version that could taste just as good. It definitely packed a spicy punch though, so if you're not good with spicy food, maybe cut back a little bit on the ground chillies or the chili bean paste. It's a good burn though and was balanced well between the heat and flavor.

Ma po tofu, the second time

It came out a little differently both times, but it was delicious each time. The tofu was nice and soft, and we loved the spiciness and the flavor. The black beans also made this really unique, and the whole dish was so good over rice. I could eat this weekly. Maybe we should, considering how affordable and tasty it is!

June Custard Calendar

A little late, but here are our thoughts on Shake Shack's June custard calendar!


We've tried most of these custards before and there were only 2 that were new to us: cherry chip (which we already posted about) and peach pecan. Here's the June lineup (with our average score in parentheses):

Monday: cherry chip (5/10)
Tuesday: buttery caramel cocoa nib (8/10)
Wednesday: fromage blanc raspberry swirl (8/10)
Thursday: root beer freeze (2/10)
Friday: mud pie (7.25/10)
Saturday: peach pecan (new!)
Sunday: coffee and donuts (5.75/10 - but a little skewed because I don't drink coffee)

If I had to pick one custard to repeat, I'd probably choose fromage blanc raspberry swirl or mud pie, depending on whether I was in the mood for fruit or chocolate. A would probably go with the buttery caramel cocoa nib or the fromage blanc raspberry swirl. Hoping peach pecan will be good!

Thursday, June 6, 2013

My First Kale

This post isn't about my first time ever eating kale. I've had this highly nutritious green several times. But last night was my first time ever cooking it!

I have to admit, I've always been a little hesitant to work with kale. It seemed like a lot of work to clean it and chop off those tough stems, and it takes me long enough to prep something simple like romaine. (I'm really slow.) But then at Wegmans (yes, again with the Wegmans love) I saw this giant bag (at least it looked giant to me) of cleaned and cut kale greens, and decided this was as good a time as any to make my first kale recipe. (Cleaned and cut greens that stay crisp and are priced affordably - why is this such a difficult concept for grocery stores?)


I found a simple sauteed kale recipe online from Bobby Flay and used that as a guideline to making my first kale dish.

Ingredients

Since this was a really basic kale recipe, just spotlighting the kale, it was relatively inexpensive - under $3!

Kale ($2.49)
Garlic ($0.05)
Olive oil ($0.05)
Water ($0)
Salt ($0)
Pepper ($0)
Red wine vinegar ($0.05)

Process

Step 1:  Usually, the first step would be to prep all the ingredients, but thanks to Wegmans, all I had to do was chop up some garlic. Thankful for easy prep.

Step 2:  Heat the olive oil in a large sauce pan on medium high, add the garlic and cook until soft. [You aren't supposed to cook the garlic until it's colored but it colored almost immediately for me.]

Step 3:  Raise heat to high and add 1/2 cup of water (or vegetable stock, but we don't have any of that on hand) and kale. [The ingredients also said to toss to combine, but the pan was so full that I could barely complete that step.] Cover and cook for 5 minutes.


Step 4:  Remove the cover, continue to cook the kale until all liquid is evaporated. Season with salt and pepper to taste, and add red wine vinegar. [All the liquid was already evaporated by the time I took off the cover, but the kale was still a little tougher than I liked, so I added more water and let it cook for longer (uncovered) until I liked the texture.]


That giant bag of kale produced two bowls of sauteed kale.

Review


The kale was pretty good. The flavor of the leafy greens really came through, since there wasn't much added to it. The cleaned and cut bag didn't just include the leaves, but also some of the stems, which turned out fairly tender after cooking them. I think it could have used more garlic (I used more than the 2 cloves from the recipe, but it still didn't taste garlicky enough for me). But it was a good first kale recipe and I'm excited to try cooking more (and different recipes) with it. Hopefully I can find another cleaned and cut bag soon!