Tuesday, May 31, 2016

Week 21 - Cheap Meals

When the theme for Week 21 popped up as cheap meals, I figured most of our everyday dinners would probably qualify and I could just make whatever I wanted. I always prefer for our dinners to be under $10 for the two of us (although sometimes if they are meat or seafood-heavy, it makes sense that they don't), and like it even better when they come in under $5. I figured I would aim for close to $5, but if it went a little bit over, that would be okay.


I thought some cheap options could be vegetable omelettes (especially since the price of eggs seems to have gone down recently), but I've made so many omelettes for previous challenges, or maybe something basic like pasta with some olive oil and garlic. Those would both probably come in under $5. But I had some soy chorizo in the fridge, so I decided to go with soy chorizo and mushroom tacos. The tacos would definitely be under $5 without the mushrooms (and we often make it without them), but I wanted to get more vegetables into the meal to make it more balanced. Working out the total costs of a lot of the other challenges really helped with this challenge, as I already had a pretty good idea of how much various ingredients cost and it wasn't a foreign concept to me to be keeping that in the back of my mind while meal planning. (I didn't realize until writing this post that I actually made soy chorizo tacos for the Mexican challenge last year, but that one was really more about the homemade tortillas. We also posted about tacos the first time we used the soy chorizo. It's clearly our favorite use of the soy chorizo.)


The ingredients for the tacos ended up coming out to a total of $5.33. They didn't put a cap on the cost of the challenge since cheap means different things to different people, but as much as I would have preferred to come in under $5, I'm fine with it since it was close. The ingredients were:

- 4 tortillas ($0.30)
- 1 package of soy chorizo ($1.99)
- 1 onion ($0.50)
- about 12 oz of mushrooms ($1.90)
- 1 potato ($0.49)
- olive oil for sauteing ($0.15)


Making the tacos was pretty easy. There was some prep - chop onion, chop mushrooms, boil potato until tender and then chop potato, heat tortillas in a nonstick skillet (without oil) - and then just cooking the onions, mushrooms, potatoes, and soy chorizo together in a large pan until it was all done. It's one of our easier dinners and works out well for Meatless Monday (or Taco Tuesday or any other day). Definitely part of our rotation.

Monday, May 30, 2016

Seabra's Marisqueira

Ever since we changed the way we approach our WorldEats challenge, we've been mostly visiting places out of "convenience," like happening to be somewhere and realizing it would work for WorldEats, or doing some other challenges like the Women's World Cup challenge (which we still need to finish recapping). While it's been great to try lots of new foods that way, there was something about the intentional trip to somewhere new that we missed. We remedied that this weekend. Instead of falling into the old trap of going someplace easy and convenient, M pulled out her trusty random number generator and let the numbers dictate where we would go. The numbers sent us to Portugal (technically, they sent us to Malawi first, but we are not aware of any Malawian food in NYC), and off we went to the Ironbound District in Newark specifically to explore Portuguese cuisine and culture.


Once the numbers popped up with Portugal, we immediately knew the place we wanted to visit in the Ironbound was Seabra's Marisqueira. We've been hearing about this seafood place for years, and it's actually the place we wanted to visit for the 2014 World Cup challenge until there were torrential downpours the night we planned to go. After looking through a lot of pictures and recommendations, we were relatively sure about what we wanted to order and were really excited for our Sunday supper.


After being seated in the dining room, they brought over a bread basket. The reviews that we read stated that it was a "crusty loafed bread" which made us think of something akin to a French baguette with a hard, crusty exterior. This couldn't be further from the truth as the crust itself was extremely pliable and matched the soft, spongy, and absorbent interior. We only ate a little of the bread before the food arrived, because we knew that it would be wiser to save the bread for soaking up all the delicious sauces of the dishes we ordered.


It was in the 80s and pretty humid outside, so a half-pitcher of sangria ($17.50) sounded perfect. Also, it seemed like every other table had a pitcher or half-pitcher of sangria, so who were we to break the trend? This really was refreshing. It had a nice mild sweetness from the added fruit juices, and just the right amount of hit from the wine. We each had some of the apple that was added in as well, and that was a nice, crisp way to end everything.


The first dish to arrive was the salada de polvo ($14), a cold salad of octopus in vinaigrette sauce. According to this Serious Eats piece, the octopus is flown in from Portugal and then poached. Joining the octopus in the salad were onions, garlic, parsley, and a light dressing of oil and vinegar. This was amazing, definitely in the top 3 for octopus dishes we've had. Every single piece was tender, and although the flavors were a simple combination, the quality and execution was just incredible. It was a great start to the meal. The remaining sauce on the bottom of the plate also made for an excellent dip for the bread.


Next up was berbigão à bolhão pato ($16), cockles in a garlic, wine, and cilantro sauce. This dish as a whole was incredibly tasty. The cockles themselves were soft and easy to pry out of the shell with or without utensils, but it was the sauce that was the star of this show. It was a simple broth/cooking stock consisting of water, garlic, white wine, olive oil, and cilantro, but it soaked into the bread so well, and it was amazingly delicious. They also offer clams cooked in a similar fashion, and while we were there it seemed like every table had at least one of these metal tins full of cockles or clams.


The last dish we got, and it was enormous, was the açorda de marisco ($21), "a traditional Alentejo 'dry soup' consisting of a hearty mix of shrimp, clams, mussels, scallops, and cubed Portuguese bread. Flavored with an olive oil, garlic, and fresh coriander sauce, crowned with a poached egg." This was a rich, decadent, creamy, thick stew once the server finished mixing the raw egg and bread into the rest of the soup. When we first looked at it, it didn't look impossible to finish, but pretty soon after we started spooning it out, we realized that the dish was really, really deep, and because of all the bread, it was really, really filling. The 2 other dishes with the bread probably wouldn't have been enough for our meal, but this dry soup definitely filled us up (and we ended up taking the rest home).


Of all of the seafood, we thought the shrimp was the best part. The mussels and scallops seemed tougher and chewier, but they still had very good flavor. You also couldn't always tell the difference between the scallops and pieces of bread by looking at them, but everything was tasty. The egg was also interesting because, since it was added right at the end and mixed in, the yolk added an extra layer of richness to the soup, while the egg whites added a soft, creamy texture to everything. Overall this was a very rich and garlicky soup/stew chock full of delicious seafood.

We loved our meal at Seabra's and while eating, were already planning out what we might order when we came back as we looked at all the dishes arriving at tables around us. (There were, as mentioned, lots of cockles and plenty of octopus, but we already knew those were winners.) We had a wonderful experience, and we definitely want to return for some more excellent Portuguese seafood.

Seabra's Marisqueira is located 87 Madison Street in the Ironbound District of Newark.

Week 20 - Outdoorsman

I wasn't thrilled about the Week 20 outdoorsman theme. I think when it originally came out, it also mentioned camping and foraging in the title, which didn't make me any more excited, as I am not into camping (ugh, bugs) and have never been foraging. The official intro thread for the theme mentioned that this was about "connecting with the types of foods and cooking you wouldn't normally encounter in places like supermarkets and restaurants." Some of their suggestions included catching dinner out on the lake or buying exotic game meat or cooking over an open fire. None of those were happening here either.

We live in an apartment in the middle of the city and don't have a balcony or even a communal area where you could grill outside if you wanted to. The closest waterway is the Hudson River, and not only do I not know how to fish, but I would never fish there. I don't really cook red meat at home, so some sort of exotic meat wasn't going to happen. And all of our ingredients were going to come from the supermarket. I decided in the end to go with a recipe by Kenji for campfire chili in a Dutch oven, but with some adjustments for both convenience (in terms of ingredients) and cooking method (since the Dutch oven wasn't going to get covered with hot coals on our stove). The original recipe was cooked over a campfire, so that was good enough for me.


The ingredients for the chili, as adapted for our apartment stove and our convenience ingredients were:

- 1 lb ground turkey ($4.30)
- 1 tbsp olive oil ($0.20)
- 1 onion, finely chopped ($0.50)
- 1 jalapeño pepper, finely chopped ($0.09)
- a few tbsp (didn't measure) chili powder ($0.85)
- about 1 tbsp cumin ($0.10)
- about 1 tbsp dried oregano ($0.10)
- about 1/2 cup of cilantro, finely chopped, divided ($0.50)
- 2 cans cannellini beans, drained and rinsed ($1.78)
- 1 can diced tomatoes ($0.80)
- 1 can diced tomatoes with green chiles ($0.69)
- salt to taste ($0.03)
- 10 scallions, chopped ($0.86)

The main differences between our chili and the original were: (a) using canned beans instead of dried (just easier and faster, even if dried would have tasted better), (b) using ground turkey instead of pounds of pork shoulder and sausage (we already had the turkey and I didn't want to make a separate trip to the meat market), and (c) going with diced tomatoes instead of crushed (mostly because we have Costco cases of diced). It probably came out a little bit cheaper because of those changes, approximately $10.80 for the total, which was a pretty good price for a big pot of chili.


The steps for making the chili were:

1. Heat olive oil in Dutch oven. Add ground turkey and cook until browned, breaking apart as it cooks.

2. Add onions, jalapeño, chili powder, cumin, oregano, and 1/2 of the cilantro. Cook for about 5 minutes or so until onions are softened.


3. Add beans, diced tomatoes, salt, and about 2 cups of water. Bring to a boil and then lower heat to allow chili to simmer. (I also covered it with the lid about 90%.)


4. Simmer for about 30 minutes and then remove from heat. Stir in scallions and the other half of the cilantro.


The chili was pretty good. It probably would have been better with some sour cream, but if you're going to make this chili over a campfire, it seems unlikely that you'd bring along a container of sour cream into the forest. The flavors were good, although in the future I might add a little bit more of each of the seasonings (other than salt). We would make this again.

Sunday, May 29, 2016

Week 19 - Mother Sauces

The theme for Week 19 of the cooking challenge was mother sauces, which are basically the 5 sauces that are the bases for other sauces. I wasn't sure if I had ever actually set out to make one of these before, but it was certainly possible that over the last few years, I'd followed a recipe that went through the steps of making a mother sauce without actually knowing I was making that. In any event, this was an easier challenge to figure out since there were only 5 choices: bechamel, espagnole, hollandaise, tomate, and veloute. I decided to go with veloute since it used chicken stock, and according to Wikipedia, it served as the basis for a sauce called poulette which added mushrooms, parsley, and lemon juice. Sounded good to me.


I decided to make some chicken to go with the sauce, since it was chicken stock-based, and on the side, roast some carrots and onions. I also ended up adding a microwave Seeds of Change packet of brown rice and quinoa to the meal, since as the sauce was cooking, I realized we had nothing to soak up the sauce. The final list of ingredients for dinner was:

- 2 pieces of boneless, skinless chicken breasts, sliced ($3)
- 3 tbsp butter, divided (1 for chicken, 2 for veloute) ($0.60)
- 1/3 cup flour ($0.05)
- 4 cups chicken stock ($0.60)
- 8 oz of white mushrooms, finely chopped ($1.39)
- 1 bunch of parsley, finely chopped ($1.20)
- a few spritzes of lemon juice ($0.08)
- 1-1/3 lbs of carrots, chopped ($1.09)
- 1 large onion, chopped ($0.60)
- olive oil to coat the carrots and onions ($0.35)
- salt and pepper ($0.05)

All together, dinner cost approximately $10.38, after adding in the rice packet. I usually try to get it under $10, but that's not too bad for dinner for two.


After peeling and chopping the carrots and onion, coating them with olive oil, salt, and pepper, and putting them in the oven to roast, it was time to cook the chicken. A took care of the chicken while I went to work prepping the mushrooms and parsley. The timing actually worked out fairly well.


For the sauce itself, I followed the steps in this Martha Stewart recipe (mostly because it was the first one I found when I looked), and did the following:

1. Melt 2 tbsp butter over medium heat. (I used the same pan that we cooked the chicken in since I figured we cooked the chicken in butter and the sauce was going to use chicken stock anyway. I doubt this is how you are supposed to make your sauce, but whatever, I wasn't about to wash the pan or waste another.)

2. Add flour and cook for a minute, stirring constantly. (I was confused by the fact that the recipe said the flour should not take on any color. I don't know how that's possible. Maybe it took on even more color because of the chicken residue in the pan, but any time I've ever combined flour with butter, it doesn't stay white. Am I doing something wrong? Or am I misinterpreting the recipe comment?)

3. Pour in stock, stirring constantly, and bring to a boil. (The roux was pretty clumpy, and it took a lot of stirring to get it to break up in the stock, which A worked on while I attended to the parsley.)

4. Reduce to a simmer and cook for 10 minutes to allow sauce to thicken.

At that point, the mother sauce itself was done and the challenge was complete. I tasted it and it had a nice, rich chicken flavor. It made sense that this would be the basis for so many other sauces.


Once the sauce seemed thick enough, I added in the mushrooms and parsley, and let the sauce cook for a few more minutes. At some point, I also remembered there was supposed to be lemon juice, so I added a few spritzes in (basically whatever was left in the squeeze bottle we had). Then I added the chicken back to the pan and let it cook in the sauce for a few minutes before it was time to eat.


I really liked how the sauce turned out. The chicken flavor was really good, and the mushrooms and parsley were a nice addition to round out the sauce. The sauce worked on top of the chicken, the carrots, and also just the rice. I liked eating it with the rice on its own more than I thought I would. We ended up with about half a bowl (maybe a cup) of sauce left over (which I ate with some chicken nuggets for lunch the next day), so perhaps I didn't need all 4 cups of broth, but leftovers aren't a bad thing in our house.


I would definitely make this sauce again, since I thought this turned out well. I guess there's a reason these have been the classic sauces for centuries!

Saturday, May 28, 2016

Birthday Frosting Chips Ahoy

We do most of our grocery shopping at Costco and Trader Joe's these days (as if that wasn't evident from all of the previous posts), since it's more convenient than making trips to 5 or 6 different stores every time. Recently we did stop by Stop & Shop to pick up some staples that we can't get at those places, and in the cookie aisle, we stumbled on a whole bunch of Chips Ahoy flavors we hadn't tried before, including these birthday frosting-filled chewy Chips Ahoy.


The picture of the cookie on the package looked like a chocolate chip cookie, but with colored chocolate chips, filled with a white cream that one would imagine was supposed to taste like frosting. There were about 18 cookies in the package which we got on sale for $3.


M's review:
I was really excited about these cookies since I love birthday cake frosting. When I looked up some reviews while in the store, a few commenters remarked that they were so incredibly sweet that it was hard to eat more than a couple of cookies in a sitting, but that sounded perfect to me because it would be an easy way to limit how many I ate at one time. After trying them though, I didn't really think they were that sweet. Sure, they were sweeter than what I remember regular Chips Ahoy cookies being, but they weren't so cloyingly sweet that I had to rush off to get a glass of water and stop eating them. But I just didn't like them that much. They were okay, but I guess I was just expecting more from them. Part of it is that I think I've been spoiled by the charmingly chewy chocolate chip cookies from Trader Joe's, and liked the texture of the TJ's ones so much better than Chips Ahoy. It's been a while since I've had chewy Chips Ahoy cookies, so I didn't realize how much of a difference there was. Sadly, the TJ's ones are now discontinued, but it just reminds me of how much more I liked them. I also didn't think the frosting tasted that much like frosting. The whole thing just tasted like a slightly sweeter Chips Ahoy cookie. It was okay, but I don't need to get them again, and I let A eat most of the package.


A's review:
I'm pretty sure I liked these more than M which is surprising. She's usually the bigger birthday cake frosting lover, and I expected that this cookie was right in her wheelhouse. I figured I'd like them, but I ended up really liking them. I thought that the frosting would be overly sweet and just be a complete sugar bomb, but it was fairly understated. I think that it was even less sweet than the filling in an Oreo. At the end of the day, these were fairly soft, fairly sweet cookies with chocolate chips and candy pieces in them. I liked them a lot, but I'm not sure I liked them enough to want to buy them again. I think I'll just stick to baking my own cookies.

Friday, May 27, 2016

Sushi Star

Last fall (I think), a new sushi spot opened up on 9th Avenue that I noticed whenever I would bike downtown, and I was intrigued by what they had to offer. It looked like there was takeout sushi, but they also advertised sushi to order. Recently, I noticed they had a discount through LevelUp, so I thought it was the perfect time to try something new.


There are 2 ways to order at Sushi Star (but I didn't know this until after I had already gotten my food). You can either get pre-made sushi or other food from the refrigerated cases on the side of the restaurant, or you can use their electronic menu and order from an even greater selection of sushi which is then made and brought out to you. Pretty cool idea. In any event, I had already chosen a pre-made "super salmon box," which had a 6 piece salmon avocado roll, plus 3 pieces of spicy salmon roll and 3 pieces of smoked salmon cream cheese roll, along with a small portion of edamame. The cost was $13.95, so after applying my $5 discount and adding tax (I forgot about tax in my initial calculations), it still ended up over $10 in total. I was trying to spend less than $10 after the discount, but didn't succeed.


The sushi rolls themselves were pretty good. I liked the flavors, everything tasted fresh, and the quality of the rolls was on par with sit-down sushi places that we've been to before. The edamame was fine, pretty standard, but a very small portion. My main issue with lunch was the price. That box was the equivalent of 2 sushi rolls plus a little bit of edamame, and without the discount, would have been over $15. Meanwhile, I could order a sushi lunch special to go from one of the sushi places in our neighborhood of similar quality, which would be 2 rolls plus miso soup and a salad, for a little over $11 (regular price). The prices at Sushi Star just seem very high for the amount of food you're getting, and I can't imagine I would be full without spending more than I would like. So while the quality was pretty good, because of how much I would prefer to spend (YMMV), I can't see going there again without a discount of some sort.

Sushi Star is located at 462 9th Avenue in Hell's Kitchen.

Thursday, May 26, 2016

Week 18 - Brown Bag Lunch

The theme for Week 18 was brown bag lunch, which for me immediately screamed sandwich. Sure, I could have done something more creative, since you can pack up lots of things for a lunch, but considering we had a lot of bread in the fridge (bought a 2 loaf pack from Costco), it seemed like a better idea to just try out a new sandwich combination.


Inspired by this Real Simple recipe for an Asian turkey sandwich with hoisin mayonnaise, I decided to make a hoisin chicken salad sandwich. The ingredients I used (for 2 sandwiches) were:

- 4 slices wheat bread ($0.40)
- 1/2 cucumber, shaved ($0.65)
- 3 carrots, grated ($0.30)
- 12.5 oz can of chicken ($2)
- 3 scallions, chopped ($0.26)
- about 1/4 cup mayonnaise ($0.46)
- about 1 tbsp hoisin sauce ($0.20)

The total for the sandwiches was about $4.27. We ate it alongside our favorite Costco chopped salad, so the total for the entire dinner was $8.76. It was pretty filling, so not too bad of a price.


To make the sandwiches, it was really all prep work, which for some reason took a ridiculously long time. The prep work included:

- wash and peel cucumber; cut in half; use peeler to shave slices of cucumber for the sandwich (I also cut the rest of the cucumber and an onion for a pickled cucumber salad so it didn't go to waste, same prep as the pickling challenge)
- wash and peel 1 lb of carrots; grate 3 carrots (I also cut the rest of the carrots to store in the freezer for a future recipe so they didn't go to waste)
- drain canned chicken and microwave for 30 seconds
- wash and chop 3 scallions
- mix chicken salad by combining heated chicken, scallions, mayo, and hoisin sauce


Once all of that was done, it was time to assemble the sandwiches, some cucumber and carrots along with a few scoops of chicken salad. I probably should have picked some cilantro out of the chopped salad and added it to the sandwich, since that's another topping that's usually on a banh mi, which is what I imagine inspired the toppings of the Real Simple sandwich. Oh well. The sandwich definitely could have used some herbs. The original recipe used mint, but I didn't want to buy an entire batch of mint just to use a few leaves. I would have used cilantro, but I didn't want to get a whole batch of that either just for this. Should have just picked it out of the salad, but I didn't realize that until the sandwiches were already eaten.


Generally, the sandwiches were fine, although we both thought they would be much more flavorful than they were, considering the addition of the hoisin sauce. The part that had the most flavor was actually the scallions, and every bite with scallions was better than those without. It was nice that the sandwich had a lot of vegetables in it and wasn't just meat, but it just wasn't very exciting. Probably wouldn't make it again, but it was fine for dinner.

Wednesday, May 25, 2016

Week 17 - Medieval

It was a bit of a challenge for me during medieval week to try to find things I wanted to make. I wasn't really inspired by much of what I saw, and there was also a lot of red and game meat (not surprising) which I don't really cook at home. I still hadn't really decided on the meal by the time the challenge week rolled around, but when they mentioned that they had done this theme in honor of the return of Game of Thrones, that sparked an idea. If this was for Game of Thrones, why wouldn't I just look for recipes based on Game of Thrones? That seemed the easiest and most logical and would obviously be "medieval enough" for the challenge.


I decided to follow a recipe for honeyed chicken and another one for white beans and bacon, both of which I found on the Inn at the Crossroads site, a Game of Thrones food blog. In the end, I also added a salad with some bacon and onion dressing. This was mostly because we had a bag of salad greens in the fridge that I had bought with the intention of using it for something else which didn't happen. But more vegetables are always welcome in our meals, and they did eat salad in medieval times, so it worked.

Honeyed Chicken

I adapted the honeyed chicken quite a bit from the original recipe, mostly because I didn't want to roast a whole chicken. We keep boneless skinless chicken breasts (Costco-sized bag) in the freezer, and while they're not the most exciting or, in some people's opinions, the best parts of the chicken, they're convenient and they work for us.


The ingredients for our version of the honeyed chicken were:

- 2 boneless skinless chicken breasts ($3)
- olive oil to rub into the chicken ($0.50)
- salt and pepper ($0.05)
- handful of raisins ($0.50)
- 1/3 cup honey ($0.55)
- 1/3 cup apple cider vinegar ($0.15)
- 1 tbsp butter ($0.15)

The cost for the chicken and sauce was about $4.90, not too bad for this portion.


To prepare the chicken, I rubbed it with olive oil and then sprinkled on salt and pepper. In retrospect, I probably should have poured the olive oil on while the chicken was on some other plate instead of the baking pan, because the excess oil smoked up a lot and kept setting off the smoke alarm. Then I roasted it until it was cooked through, checking the temperature with our likely unreliable meat thermometer. I think it was about 20 minutes at 400 degrees, but it's been a while and I can't seem to find my notes from the night I made this.


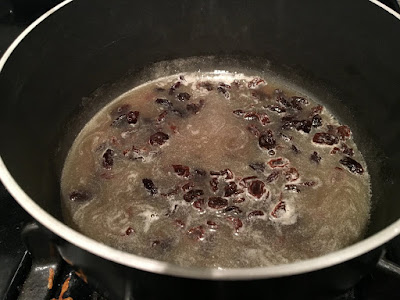
While the chicken was roasting, we worked on the sauce. I'm not usually a huge fan of mixing fruit with savory dishes (I know I've mentioned that a whole bunch of times in previous posts), but I was willing to give it a try in this sauce. To make the sauce, you combine the apple cider vinegar, honey, raisins, and butter in a saucepan, and let it simmer until the sauce reduces a bit and the raisins soak up some of the sauce. I don't remember how long this took, but it wasn't a super long time.


Once both parts were done, we poured the sauce over the chicken and that component of dinner was done. Overall, we thought it was fine, but it isn't something we necessarily need to make again. I wasn't the biggest fan of the sauce because of its sweetness. A liked it more than I did, but that was the result we both expected. He thought the sauce and the chicken paired very well. The original recipe also included a dash of mint, but I didn't want to buy an entire batch of mint just for a few leaves and also didn't have any dried mint on hand. It probably would have been better with it, but it was okay without it.

White Beans and Bacon

To go with our medieval chicken, I decided to make a side of white beans and bacon. The site we got the recipe from provided recipes for both medieval white beans and bacon and a modern version, but we of course went for the medieval one.


The ingredients for our white beans side dish were:

- 1 can of cannellini beans ($0.89)
- 5 pieces of bacon, chopped ($2.75)
- 1 onion, chopped ($0.50)
- 3 cloves of garlic, chopped ($0.08)
- pepper, nutmeg, and cinnamon to taste ($0.20)

The beans cost about $4.42, mostly due to the cost of the bacon, but they were really filling for the price. Combined with the chicken (which was the original conception of the meal), it came out to about $9.32, which is pretty reasonable.


We followed the recipe pretty closely, which began by frying the bacon until mostly cooked through. After the bacon was done, we moved it to a bowl, and sauteed the onions and garlic in the bacon fat until they were tender.


The bacon then got added back in, along with the beans. We let it cook for a while over low heat, basically until all the chicken stuff was done. I seasoned it with freshly ground pepper periodically, but only added the nutmeg and cinnamon near the end. The recipe had said to add poudre douce to taste, which according to Wikipedia (since I had no idea what it was) means sweet powder and is often used in medieval and Renaissance cooking. They wrote that it might include grains of paradise, ginger, cinnamon, nutmeg, sugar, and galangal. Instead of making my own mix, I just went with cinnamon and nutmeg to get some of the sweet flavor. The nutmeg came across really intensely, much stronger than I thought it would be, but I added that and the cinnamon anyway to see how it would taste.


We liked the white beans and bacon. It was definitely filling, and comfort food in that stick to your ribs way. I personally liked it much more than the chicken, mostly because of the sweet sauce on the chicken. I would consider making this dish again, although I feel like I might do some more experimenting with the spices. I'm not sure what other ones would go well with it, but perhaps some additional ones or a little less nutmeg would be good.

Salad with Onion and Bacon Vinaigrette


The final component of our medieval meal (although we ate it first) was a salad with some Sorrento greens from Trader Joe's. That mix has baby arugula, baby spinach, and baby lettuces. I wasn't sure how historically accurate it was to eat those greens, but according to this site, they did have lettuce at the time, just not iceberg.


That site also advised that people did use oil and vinegar dressings with some herbs and seasonings. I was originally going to just use olive oil and some vinegar, but then remembered that we had this sweet onion and bacon vinaigrette dressing in the fridge. I thought that would work since we did just use onions and bacon in other parts of our medieval meal. It seemed to fit perfectly.


Since we haven't done a separate post on the greens or the dressing before, here's the quick reviews:

Sorrento Greens
Price: $1.99
Quick review: A more interesting blend than just plain romaine or spinach or arugula, but sometimes tougher to find a good bag without wilted leaves. When there's a good bag, it's a good salad green because of the variety and it's not as bitter as the regular rocket.
Buy Again? Sure, when they look good, but since the greens at TJ's are hit or miss in terms of quality, depends on the batch.

Sweet Onion and Bacon Vinaigrette
Price: $2.99
Quick review: As soon as I saw this on the new items shelf, I knew I had to buy it. It's not bad - a little on the watery side - but it didn't have as much onion or bacon flavor as I would have expected from the name. The dressing has actual sweet onions and bacon bits, along with mustard, some spices and seasonings, and natural hickory smoke flavor.
Buy Again? Maybe, but we like the sriracha ranch better.

Our 3 part medieval meal was interesting, but I think I prefer "modern" cooking a little more. It's always fun to do these experiments and explorations though, which is why I'm thankful the challenge exists!

Tuesday, May 24, 2016

Rodeo Rings

I went to Burger King recently and had a ridiculously unhealthy lunch. I went with the intention of trying the new chicken rings they've been promoting all over the place (even if I hate that they are actually named "chicken fries rings" because I think that name sounds so wrong), and I can never resist the call of onion rings when I'm there. I figured I'd end up sharing some of the chicken rings with everyone else, so I also tacked on a rodeo chicken sandwich that I found on the value menu but had never heard of before.


The chicken rings (I really can't say chicken fries rings; I know they trademarked chicken fries and that's why they're named that way, but I still can't) are similar to the chicken nuggets and chicken fries at Burger King, lightly breaded, seasoned, and shaped white meat chicken. I wasn't entirely sure what the seasonings were, but according to the nutritional information sheet, the seasonings are paprika, garlic, onion, and "spices."


As far as size, they're quite a bit larger and thicker than the onion rings, which are probably the best point of comparison. The box had 6 rings for $2.89, but I think that price varies by branch. I liked the chicken rings a lot, and would consider getting them again. But I've always liked the fried chicken nuggets and fries at Burger King (and chicken nuggets in general), ever since I was a kid, so it's not surprising that I like these too, despite the horrible name.


The rodeo chicken sandwich combined everything that I usually get from Burger King into a single sandwich - fried chicken, onion rings, and BBQ sauce. I'm not sure if I just missed advertisements for this when it was a new menu item (since even if they're playing on TV, I often tend to mentally tune them out) or if it just appeared on the value menu with no fanfare, but I never noticed it before. It was kind of like deja vu, same type of experience we had when we went to McDonald's on a road trip last year and found the grilled onion and cheddar burger on the value menu that we'd never heard of.


Although the rodeo chicken sandwich was okay, I think I preferred the fried chicken (in the form of the rings) and the onion rings with my dipping packets of BBQ better than the sandwich put together. I think it's because the onion rings on their own were crisper than they were in the sandwich, and I could control the amount of BBQ sauce better. Also, the sesame seed bun had the same problem a lot of fast food buns do in that they get a little bit soft and soggy. The sandwich was fine, but I think I'll stick to the nuggets (or rings or fries) and onion rings separately.


I definitely overdid it with all the fried food that day at Burger King, and probably should have mixed it up with some other stuff instead of just fried chicken, fried chicken, fried onions, and more fried onions. I made all my choices pretty quickly, so now I'm wondering what else was on the value menu that I didn't know about but could have tried. I'll take a closer look next time.

Monday, May 23, 2016

Yialos

Five years ago today, we had an amazing day in Naxos, Greece on our honeymoon. After starting the day off with a giant breakfast at the hotel, which had such a fantastic spread every morning, we went over to Agios Prokopios Beach, spending our time basking in the sun and wading in the crystal clear water. It was incredibly relaxing. We continued our beach day after returning to the hotel since our hotel was next to another beach, Agios Georgios (Saint George). That one was pretty different because you could walk out for yards and the water would still only be knee deep. It was fantastic.


Since we ate such gigantic breakfasts every morning at our hotel, we rarely ate a full lunch on our days in Naxos (which is the opposite of how we usually travel, when we eat a granola bar for a breakfast and then focus on having a bigger lunch), instead choosing to get a couple of light snacks before dinner. Our local beach had a bunch of small beachside tavernas, and it seemed like the perfect extension of our beach day to get some food from one of them for our daily snack. The one we stopped at was called Yialos, and we got a table with a full view of the beach. It was glorious.


We decided to order two dishes - stuffed vine leaves and a dip (which we think is skordalia, but aren't 100% sure this many years later), which we ate with some bread - and a couple of Mythos beers. We don't really remember a ton of specifics about how the food tasted there, other than that we liked it, but we absolutely remember the experience. It was perfect, exactly what we wanted on our last afternoon in Naxos. There was good food, cold drinks, a great view, and just a super relaxed atmosphere. While we sat there, just people watching, relaxing, resting in the sun, we didn't have a care in the world. It's a feeling I think we both wish we could replicate on every vacation, but we're not always successful.


The entire experience only cost us €11 (no idea what it would be now, but that's what it was 5 years ago), and it was totally worth it for a relaxing afternoon on the beach with tasty snacks. Once we left, it was time to head into town to buy our tickets for our next destination, take in a last sunset over the Portara (an absolutely magical experience in our opinion), and try to enjoy every last minute of our final night in Naxos. That was truly our favorite island, and the relaxing vibe and good food we had at Yialos was pretty representative of why we loved it so much.