Friday, December 25, 2020

Week 21 - Flour

The Week 21 challenge, flour, got postponed for over a month. Originally, my plan for the "from scratch" challenge was to make focaccia, but I pushed that back to the flour challenge once that was announced because it seemed to fit better there. We were waiting on yeast anyway at the time, so it didn't really matter where we put it. For my first time making focaccia, I decided to follow a recipe I found on Inspired Taste for an easy rosemary garlic focaccia bread. Easy sounded good since I was (and still am) a novice bread maker.

[Note: I made this back in July, and it was our third time baking with yeast, so we still didn't really know what we were doing. Initially, I wanted to post our bread/yeast adventures in order, but who cares about order anymore as the end of the year approaches? I'll admit that it's a little strange finishing and editing this post I started back in July now that we know so much more about bread, and also having recently posted about baking a loaf of bread, but I guess I should just try posting more timely...]


The ingredients for the focaccia were:

- 1/2 cup of olive oil, plus extra for oiling the bowl and baking pan ($1)
- 1 spoonful of minced garlic ($0.10)
- garlic powder ($0.03)
- rosemary ($0.10)
- thyme ($0.10)
- freshly ground black pepper ($0.02)
- just under 1 tbsp of yeast ($0.19)
- one small squeeze of honey ($0.10)
- 2.5 cups of flour, divided, plus extra for flouring surface/hands ($0.47)
- 1 cup of warm water ($0)
- 1/2 tsp of salt ($0.01)

The cost of the focaccia was approximately $2.12. I don't think I had ever realized how inexpensive it was to make your own bread. Paying with your time and labor, I guess! We paired the focaccia with a simple pasta dish with spinach and turkey meatballs, so my estimate for dinner (without knowing the exact costs of any of those) would be somewhere around $10. Not bad for a lot of food.


The steps to make "easy" focaccia were:

1. In a small skillet, heat 1/2 cup of olive oil with the minced garlic, garlic powder, rosemary, thyme, and black pepper over low heat for about 5 minutes, constantly stirring and making sure the garlic doesn't burn. Remove from heat and allow to cool to room temperature.

2. In a large bowl, mix the warm water, yeast, and honey. Stir and allow to sit for 5 minutes.


3. Add 1 cup of flour and 1/4 cup of the infused oil to the bowl with the yeast. Stir and let sit for at least 5 minutes. Make sure the oil is cool before being added so it doesn't kill the yeast.

4. Add 1.5 cups of flour and the salt. Stir until mixed together and a dough has formed.


5. Knead on a floured surface (I did it in the bowl, adding flour to the outside of the dough and my hands, maybe not the best idea looking back) about 10-15 times. [Ours felt really wet and sticky. Knowing what I know now after taking some bread-making classes, I should have tried adding more flour before kneading.]

6. Oil a large bowl. Put the dough in the bowl, cover tightly with plastic wrap, and let sit for 1 hour so it can rise.


7. Preheat oven to 450 degrees. Using a 9x13 baking pan or dish with tall sides, grease the pan with 2 tbsp of the olive oil mixture. If not oiled enough, add some regular olive oil.

8. Transfer dough to pan, press down to the edges, and then dimple the dough with your fingers.


9. Top the dough with the rest of the infused olive oil, and then let the pan sit for 20 minutes for the dough to rise again. [Not sure ours did.]

10. Bake for 15 minutes. Remove and cool on wire rack.


Looking back at this bread experiment (which, as I mentioned, was the third time using yeast after the fun coconut buns/coconut cake experiment, and then some Afghan naan), I really had no idea what I was doing. I still consider myself a beginner at making bread, but I've learned a lot from some really knowledgeable people in the interim, so I kind of wish I had finished writing this post before that so I could see how far I've come. That night after I made the focaccia, I went reading other recipes and comments on how to make focaccia, and came across people using dough hooks and stand mixers, and they were testing their dough with the windowpane test. I hadn't done any of that, and I didn't even understand what the windowpane test was (I do now!), but something at the time told me that my focaccia hadn't come out quite right, didn't really rise enough, or some other issue that I couldn't identify, which is why I ended up researching. My guess now is that the dough wasn't the right consistency at the kneading step (probably needed more flour), and probably wasn't kneaded enough. No way I'm going to know unless I try it again sometime, and since I love focaccia, I probably will.


Technique aside, how was the bread itself? It was delicious! Maybe it wasn't as fluffy as restaurant or bakery focaccia, but the infused olive oil had great flavor and we all liked the bread. Even if it wasn't perfect, I was happy with how it turned out. Definitely want to give focaccia another try sometime.

Week 50 - Sage

I love sage, but it was difficult to choose a recipe for the Week 50 challenge because sage isn't usually the spotlight ingredient whenever I use it, even if it does play an integral part in the flavors of a dish. I originally thought about baking some chickpea sage fries, but when I went to read the recipe an hour or so before dinner, I saw that the batter was supposed to chill in the fridge for a few hours before frying (or, in my plan, baking), so that wasn't going to work. I was lukewarm on making the fries in the first place, so instead of trying that another day, I went back to search for more sage recipes. That's when I found a recipe for sweet onion sage bread on Kitchen Divas, and decided that would be a better fit for us.


The ingredients that ended up going into the bread were:

- 1 red onion ($0.77)
- a few tsp of dried sage ($0.10)
- freshly ground black pepper ($0.02)
- olive oil (not measured, used in several instances) ($0.40)
- 2-1/4 tsp yeast (equivalent of one packet) ($0.40)
- 1/2 tbsp sugar ($0.06)
- 3/4 cup warm water ($0)
- 2-1/2 cups all purpose flour, plus more for kneading (another cup or so) ($0.40)
- 1 tsp salt ($0.02)
- olive oil cooking spray ($0.15)
- Herbes de Provence ($0.20)
- a few grinds of salt ($0.02)

You might notice that there are two onions in that ingredient photo while the ingredient list only mentions one. When I started, I was following the measurements in the original recipe, but it just seemed like such a big recipe, using two packets of yeast and five cups of flour, so I decided after already chopping the onions to cut the recipe in half. The total cost for the bread was a little more than $2.50, which is pretty good considering how much bread it made. We ate it with plant-based breakfast sausage and some vegetables (zucchini, carrots, and the other chopped red onion), each of which cost approximately $4, so it was about $10.50 for a lot of food.


I generally followed along with the steps in the recipe, also using some techniques and tips we picked up from some of our bread-baking classes this fall. The steps for making our version of the bread were:

1. Prep - finely chop red onions.

2. In a skillet over medium heat, add some olive oil, and once hot, add onions, dried sage, and some black pepper. Cook until onions are soft and then set aside to cool.

3. In a small bowl, add the yeast, sugar, and warm water. Stir and then let sit for about 10-15 minutes. (It should be frothy and growing.) After that, add about 1/2 tbsp of olive oil.

4. In a large mixing bowl, combine the flour and salt. Then add the yeast mixture and onions, and mix well, making adjustments of water/flour until texture is ready for kneading. (I added a little water.)

5. Put dough on a flour-dusted surface and knead for at least 5 minutes, adding flour or water as needed. (I kneaded it for 15, adding a little bit of flour each time as I kept going along, totaling probably around one cup. I don't know how to explain how I decided when to stop, but it was based on the stickiness and stretchiness of the dough. I also used the windowpane test.)


6. Spray the inside of a big bowl with olive oil cooking spray, put dough in the bowl, flip over, and spray the top with more cooking spray. Cover with plastic wrap (also sprayed with cooking spray on the inside). Set aside to proof for 45-50 minutes until it doubles in size. (I used the microwave as bread proofer here, and after trying that a month or so ago, we haven't done it any other way.)

7. Once dough has doubled in size, punch it down gently, divide it into 2 pieces, and shape into loaves. (Even though I was only making half of the recipe, I still separated it in two.)

8. Grease a rimmed baking sheet, add loaves, and brush loaves with enough olive oil to cover them.


9. In a small bowl, combine a few grinds of freshly ground black pepper, a few grinds of salt, and a few spoonfuls of Herbes de Provence, and mix well. Sprinkle over loaves, and then let loaves sit uncovered for another 30 minutes to rise.

10. Preheat oven to 350 degrees. Bake loaves for about 30 minutes. (We checked the temperature to see if it was 190 degrees at that point, and it was more. The original recipe said to leave it until the crust was golden brown. Ours didn't get that golden, but we pulled it out anyway.)


11. Remove loaves and cool on wire rack.

I loved the texture of this bread. It came out so soft, which was good for me, because I like soft bread more than bread with a harder crust. Each slice was soft, pillowy, and so full of olive oil and herbs in flavor. It was like biting into bread that had been dipped in olive oil and herbs, but without the actual dipping. I was having memories of Carrabba's (haven't been there in years since they closed the one near my parents) and their delicious bread, olive oil and herb mix, and it reminded me so much of that. As far as the challenge, you could taste the sage as part of the herb mix, but I don't think I would say that the bread tasted strongly of just sage.


This bread was so delicious that A and I definitely ate more calories in bread than we were planning to, but it was so hard to stop eating, especially knowing that freshly baked bread tastes so much better right out of the oven than out of the fridge or freezer (although it was pretty good out of the fridge the next day too). I'm still amazed that I baked a real loaf of bread, something that I would have never expected to say if you asked me a year ago. (But who would have predicted 2020 last year?) I've come a long way since my first yeast experiment with the lolo buns (that turned into a cake) earlier this year, and I'm still shocked that this was made with my own two hands. I would definitely make this bread again.

Thursday, December 24, 2020

Week 49 - 30 Minutes

If you've been reading cooking posts here for any length of time, you probably already know that I have speed issues with cooking. That's why I like when challenges like the Week 49 challenge, 30 minutes, come up, because I can challenge myself to get faster. They've done this challenge before, and back in 2016, I did finish the entire meal in 30 minutes, but it was largely done by using shortcuts (frozen roasted corn, protein was just pre-seasoned panko chicken tenders in the oven, etc). This time, I decided to pick a meal from scratch that was only supposed to take 30 minutes (including prep time) to see if I could do it.

I chose a teriyaki chicken stir-fry from Well Plated, which was supposed to be 15 minutes of prep time and 15 minutes of cooking. Since you can use whatever vegetables you want in a stir-fry, I thought there was a good chance it would take me longer than 30 minutes total even though I tried to pick some simpler vegetables, but I still wanted to give it a go.


The ingredients for the stir-fry were:

- 1/2 cup water ($0)
- 1/3 cup soy sauce ($0.50)
- about 3 tbsp honey ($0.69)
- about 1 tbsp rice vinegar ($0.10)
- big spoonful of minced garlic ($0.15)
- equivalent amount of ginger ($0.30)
- about 1 tbsp sesame oil ($0.30)
- big scoop of cornstarch ($0.25)
- 1 yellow onion ($0.61)
- 1 green pepper ($1.06)
- 1 red pepper ($1.56)
- small batch of scallions ($0.99)
- small bag of snap peas ($3.99)
- 1 package of extra firm tofu ($1.89)
- grapeseed oil for stir-frying ($0.10)
- 2 Bibigo microwavable sticky rice packets ($2.25)

The total cost for the dish was approximately $14.74, a little higher than I would have expected for this vegetarian dish, but almost a quarter of that was the snap peas alone.


Making the dish was relatively straightforward as we've made many stir-fries before. I often just stir-fry the protein and vegetables and then toss sauce ingredients on top of it in the wok, but since this one called for the teriyaki sauce to be made on the stove, I tried it that way instead. The water, soy sauce, honey, rice vinegar, garlic, ginger, and sesame oil get mixed in a small pot on the stove, and then once boiling, a slurry of cornstarch and water is added to thicken it up. Unfortunately, when I threw the cornstarch slurry into the sauce, I didn't whisk it fast enough (I think I was doing multiple things at once), and when I got back to it, the sauce had formed giant gelatinous-like clumps. Oops. I was able to improve it and break some of that down a little bit, but even when the sauce was added to the wok, there were some jelly-like bits that we sometimes mistook for onions.


Anyway, the sauce was made in the pot, while the tofu and vegetables were cooked in the wok, and then the sauce was added at the end. The original plan had been to stir-fry the tofu, remove it from the wok, then cook the vegetables, and then add the tofu back in with the sauce, but there was something wrong with this tofu. I bought extra-firm on purpose so that it would be more likely to stay intact when sliced and stir-fried and not crumble like soft tofu, but this package of tofu crumbled more than any firm tofu we've used recently. The last package of 365 firm tofu that we made a week earlier was super firm, so I was looking forward to using the extra-firm and having it be even sturdier. Nope. It was significantly less firm and crumbled when I was slicing it. Just this batch? Mislabeled? Who knows, but it was like having scrambled tofu which was the exact opposite of what I was trying to do. We liked the dish overall and the sauce was good, but it would have been so much better with recognizable slices of tofu.


As far as the 30 minute challenge, how did it go? It took 58 minutes. At the 30 minute mark, there was still nothing in the wok, but I think I could have cut the time a little bit if not for a few things that slowed me down:

- The red pepper and green pepper we got from Whole Foods were a little old. The red pepper had some softer spots, and the green pepper had a gash in the side and a giant soft spot, so I had to chop them more carefully and slowly than I would have if they were in great condition.
- I wasn't expecting to have crumbly tofu sticking to the wok, which then couldn't be set aside for the vegetables, which also meant that the vegetables couldn't cook as quickly on their own in the wok.
- Breaking down the mountains of cornstarch in the sauce took a while, and if I had whisked it well enough from the start, that would have eliminated some time.

In the end, it was still under an hour, which was good for me, even for a straightforward stir-fry. We liked how it turned out, other than the tofu, but the tofu wasn't the fault of the recipe. (Seriously, how could that have been extra firm?) I would make this sauce for a stir-fry again.

Week 13 - Deep Frying

I wasn't planning to participate in the Week 13 challenge when it was first announced as deep frying. Back when the same challenge came up in 2016, I mentioned that I don't deep fry at home for a whole bunch of reasons (health, safety, convenience). At that point, I was really trying not to skip any weeks, so I substituted shallow frying for deep frying instead. When I returned to the challenge this time around, I gave myself permission to skip any weeks I just didn't feel like doing, so I figured deep frying would just be one of those.

I did consider taking something that usually gets deep fried and baking it instead, but after remembering my many, many failures at that (onion ring attempt,  Scotch eggs attempt, mozzarella sticks attempt #1, mozzarella sticks attempt #2), I decided against it. It would be one thing if it was just me eating it, or me and A (who eats everything), but I didn't want to make baby B suffer through something terrible. He's still developing his taste buds, and if it were something awful, he might never want to try that thing again! Plus, we couldn't use eggs in the breading and dredging process, so what would I even make?

Our inspiration: bolani at Ariana Afghan Kebab Restaurant in Hell's Kitchen

That was the decision I made back in March, but fast-forward a couple months to June. As part of our AtWCC exploration of Afghan dishes, I wanted to try making some bolani, a flatbread/turnover-type thing usually filled with potatoes, pumpkin, or assorted vegetables. We had eaten these before at the Afghan restaurant near our old apartment (one day, we'll write about that for WorldEats...), and they were definitely very fried and crispy. If I was going to take something typically deep-fried and try to make it as a baked dish, then I might as well count this for the deep frying challenge! As for our other concerns, egg wouldn't be necessary to make these, and I planned to keep some of the filling separate to give to B in case the actual bolani turned out to be a disaster. As for my concerns about dredging failures, I guess I just keep trying, because I made those crunchy onion rings later in the summer.

[Side note: You might notice I mentioned June above. I wrote the initial draft of this a very long time ago, and that also gives some idea of how long ago we started cooking for the AtWCC. My plan had been to write our Afghanistan WorldEats posts and then publish the AtWCC posts for Afghanistan in the order we made the dishes to better reflect our cooking "journey," but none of that has happened yet, it's the end of December, and it's time to get as many challenge posts out there as possible before the end of the year!]

Apparently I forgot to take a picture of the ingredients (or was in a rush, can't remember), so here's a photo of all the components together

I started with a recipe I found on V for Veggy, and made some adjustments (ingredients, but most notably, baking instead of deep frying). The ingredients we used were:

for the dough:
- 2.5 cups all-purpose flour ($1)
- 1 tsp salt ($0.02)
- 1.5 tsp olive oil ($0.15)
- 1 cup water ($0)
for the dough "process":
- flour for work surface ($0.05)
- olive oil coating for mixing bowl ($0.10)
- small bowl of water for adding to the dough while kneading ($0)
for the filling:
- 2 russet potatoes ($1)
- 6 scallions ($0.65)
- 1/2 bag frozen spinach ($0.75)
- ground coriander ($0.15)
- garlic powder ($0.05)
- ground cumin ($0.15)
- salt and pepper ($0.05)
for the yogurt sauce:
- 1 cup plain Greek yogurt ($1.38)
- a lot of garlic powder ($0.10)
- a little salt ($0.02)
- small batch of mint (about 1/3 cup chopped) ($1)

One thing I will say about this recipe was that it was very budget-friendly. Dinner for the three of us was approximately $6.62. We haven't seen a challenge meal come out that affordable in a long time.

Making the dough

This was a labor-intensive recipe, which I knew going into it. I figured it would take at least 1.5-2 hours. Unfortunately, we got a late start, and it did edge slightly over the 2 hour mark, but considering how slow my pace usually is, it was better than it could have been. The steps for making the baked bolani were:

1. Combine ingredients for dough in large bowl.

2. Knead dough until it's soft, smooth, and not sticky. [The recipe had really good time estimates here, and was exactly right that it would take 10 minutes. I would periodically wet my fingers to add a little more water to the dough when kneading, so it was probably a little more than a cup of water in the end.]

Ready to proof

3. Coat the mixing bowl with olive oil, and cover dough with a wet towel. Proof for an hour.

4. While dough is proofing, prep potatoes (peel, chop, boil, and mash), chop scallions, and chop mint.

5. Make yogurt sauce while potatoes are cooking by combining all ingredients. Chill until ready to eat.

Mashed potato filling

6. Make mashed potatoes by combining all ingredients for filling and seasoning to taste.

7. Divide dough into 8 portions, roll out into large circles on a floured work surface, and spread the filling on half of the circle, leaving the edges free. Wet the edges, fold over, and seal.

Those are not circles. Not even close

8. Bake on parchment paper at 450 degrees for 10 minutes.

9. Remove from oven and eat with yogurt sauce.

Final product

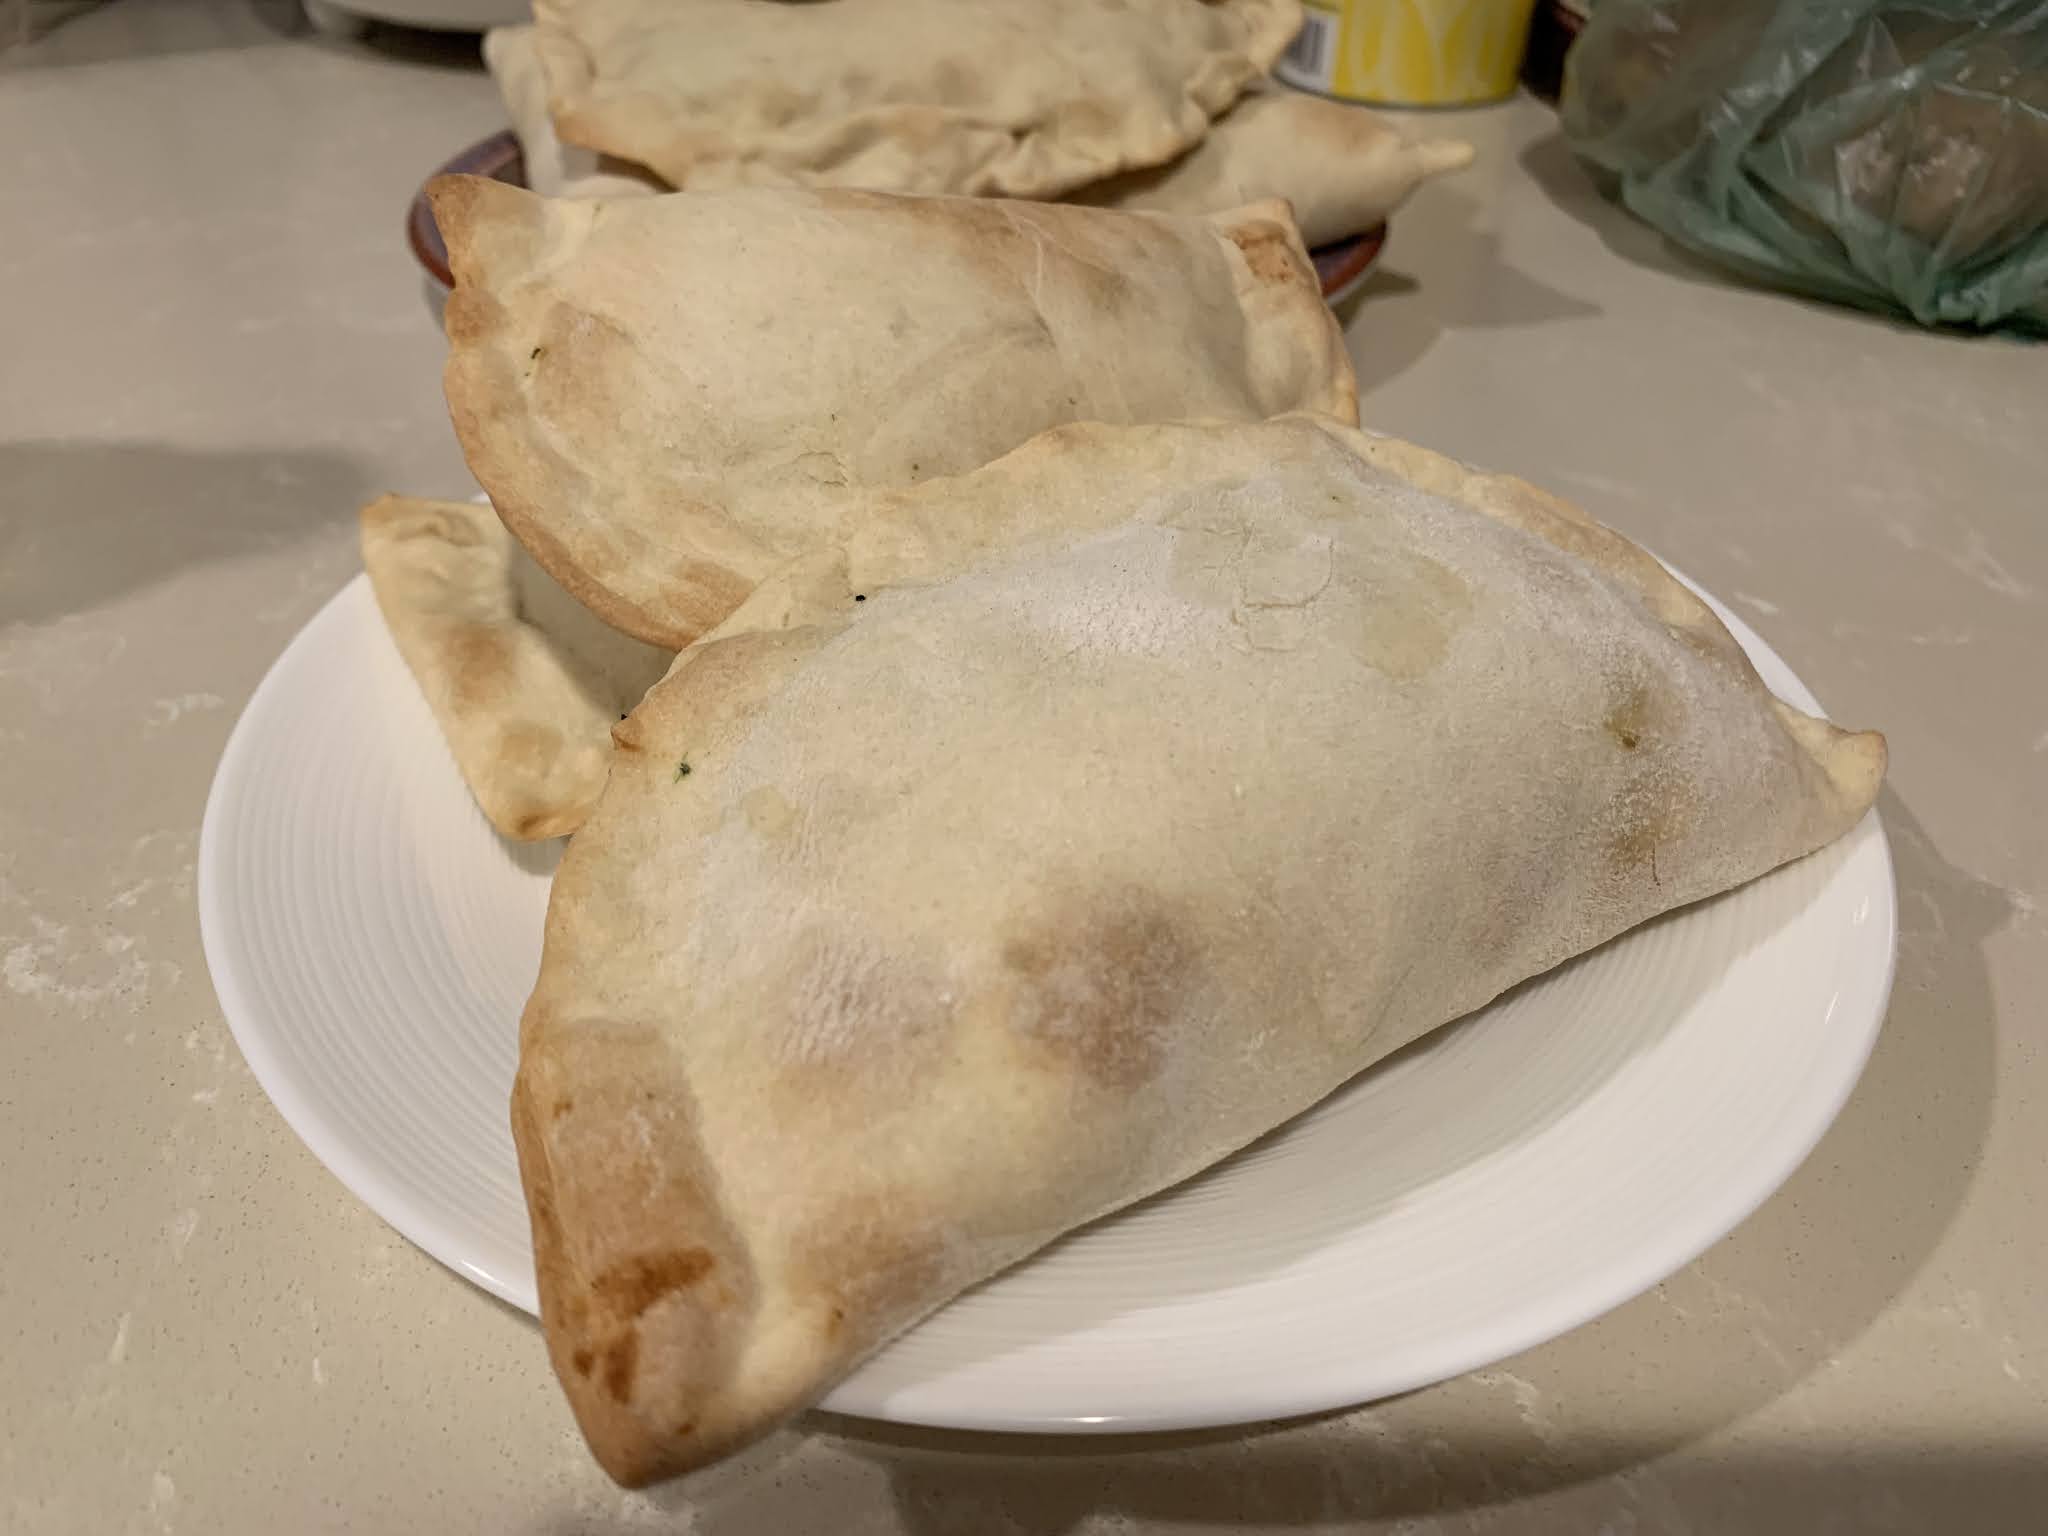
The author had given some baking recommendations to another reader in the comments, noting that it would still not be as good as frying (which I knew and was okay with), so I followed those. That time and temperature yielded a nice crispy crust, and the way they ballooned, they looked like not-that-filled baked empanadas. They were never going to be the same as fried, but they did turn out crispy and crunchy.

As a side note, this was my first time kneading dough and using a rolling pin. I don't know how I made it this many decades without actually doing that. I found the entire process very calming, which was good since we had just bought a pound of yeast at this point in the year. The kneading went well, but the rolling out, not so much. I couldn't make a circle even after 12 tries, and only had a few that were remotely symmetrical. And the reason I had 12 tries was because, even though I used some flour to separate them, I guess I left them too long and the bottom ones all stuck together, so I had to do it over again. Definitely need more practice!

This is how things are shaped when you can't roll out even circles

My backup for the bolani was intended to be little mashed potato cakes. I figured I would just take the remaining spinach-potato mixture, make it into little balls, and pan-fry them with some olive oil. A few minutes in, as the mixture started sticking to the pan, I got this unsettling feeling of deja vu. This had definitely happened to me before. I was basically making bubble and squeak, and I remembered how much of a failure that was in the past. (Proof here.) Before more of the potatoes could stick to the pan, I quit that and figured we'd just have a side of spinach mashed potatoes. (Reading over old posts, it seems I did make bubble and squeak work on a second or third attempt, but it would have taken 20+ minutes in the pan, and we didn't have that type of time anyway.)


So, what was the verdict? A little over two hours of work, but I was disappointed (and I don't blame the recipe at all). It was never going to be as good as the bolani in an Afghan restaurant because we weren't frying them, but the whole thing was a little bland. The spinach filling, despite all the seasoning I added to it, seemed to lack flavor, and the dough had no flavor either. I probably should have seasoned it a little since I wasn't going to be frying it, so it wasn't going to pick up the flavor from the frying oil. Generally, there wasn't really anything wrong with how they turned out, but they just felt so lackluster, and meh is the last feeling I want after finally eating something I just spent two hours on. Thank goodness for that yogurt sauce though. It made everything better! As is often my conclusion when I try baking something that comes out really well deep-fried, I think in this case, we'll just leave it to the experts and get these from restaurants.

Tuesday, December 22, 2020

Week 48 - Gourds

When I think of gourds, what comes to mind first are mostly decorative and ornamental gourds, so I wasn't sure what to do for this challenge. Then I remembered that things like butternut squash would qualify, so I went off to research what other gourds I could cook with, since breaking down a butternut squash is not among my favorite activities. A list on Lifehacker ranked edible gourds with some preparation tips, which was super helpful and led me to what I ended up making - delicata squash!


I think I've eaten delicata squash once or twice, not 100% sure, but I've never cooked it before. After surveying a bunch of different sites, it seemed that the most common and foolproof way to make it was to roast it in the oven. The ingredients for our delicata squash experiment were:

- 2 delicata squash ($3.25)
- Spanish olive oil ($0.30)
- salt and pepper ($0.05)

It was a late dinner, but I didn't start that late. Still haven't changed the time on the rice cooker yet...

The squash portion cost about $3.60, and we paired it with some Trader Joe's microwavable mashed potatoes (not sure how much the bag cost, so probably another dollar) and Gardein's vegan 7-grain crispy chick'n tenders ($4.79). Dinner came out to approximately $9.39, which was not bad for three people, especially considering the bulk of the price was the pre-made Gardein tenders.


To make the squash, I cut them in half lengthwise, scooped out the seeds and stringy parts (harder than I thought it would be and not all the stringy parts came off, but in retrospect, guess I didn't need to be that precise), chopped them into half moon shapes, and then covered them with olive oil, salt, and pepper. Into the oven they went at 425 degrees for 25 minutes (swapping locations on the oven racks 15 minutes in).


One of the reasons people love delicata squash is that you don't have to peel it unlike a lot of other squash. The skin is edible, and it's supposed to get really soft when you roast it. It was soft enough to eat, but it turned out a little dry and crunchy, so I pulled it off of B's pieces. I made sure there was oil on all of the skin parts, so I'm not sure how to get it any softer in the future. (Any ideas, let us know!)


As far as taste, it turned out delicious with the simple olive oil, salt, and pepper seasoning. We were really happy with the squash, which was good because we had so much of it. I don't know why, but I always pictured delicata squash as smaller than the ones we got, which is why I got two. It turned out to be the right amount for us to get two squash, and we did finish it all, but it filled our entire oven on its two trays, leaving no room for anything else and meaning the chick'n had to be made after the squash, leading to a late dinner. The whole meal worked though, and I would definitely do this again!

Monday, December 21, 2020

Kung Pao Chicken Mochi Balls

We don't often post more than once a day, but with 10 days left to the end of the year, we still have about 17 more posts on the 52 week cooking challenge, all the posts from two different geographic locations in the Around the World Cooking Challenge, and lots of other WorldEats and Trader Joe's posts we just haven't gotten to yet, besides the usual year-end round-ups. Going to post as much as we can to try to preserve as many memories as possible and wrap up the year!

These kung pao chicken mochi balls are the type of hors d'oeuvres I'd expect to see closer to New Year's/end of the year, but they appeared at Trader Joe's back in the late spring/early summer. They've been sitting in our freezer since then, and we finally got around to trying them recently. Since we haven't been doing many grocery haul photos this year (thanks, COVID), I have no idea how much we paid for them, but the TJ's blog says they were $3.99 for 8 balls.


Inside each ball was a chicken and vegetable filling consisting of chicken, cabbage, red bell peppers, water chestnuts, celery, green onions, soybean oil, rice wine, garlic, ginger, soy sauce, and chili oil (according to the box). Not sure which components were part of the sauce and which were part of the chopped filling, so I'm not going to guess, but they were all in there somewhere.


Each mochi ball had a crisp exterior (they were fine, probably would have been crispier if we cooked them longer, but we followed the box instructions), and then the shell got chewy once you bit into it. It definitely had the chewiness of a mochi baked good, and it stuck in our teeth. The filling was actually spicy like kung pao chicken, so between that and the sticky chewiness, it was probably good that we didn't share them with baby B for lunch. The balls weren't that filled with stuff, although they did have good flavor. Together though, A thought that the sweetness of the mochi didn't always pair well with the spicy chicken filling.


Buy again? Probably not. We thought they tasted good and we were glad we tried them, but just didn't feel that excited about them. If you really like kung pao chicken, you'd probably enjoy them.

Week 36 - Caramelizing

I love caramelized onions. They take so long to make, but they're so delicious. The Week 36 challenge, caramelizing, was a repeat of a challenge I did in 2014 when I also made caramelized onions, but I was definitely going to do it again because I like caramelized onions so much. I found a bunch of recipes online that sounded good, but then realized that the next recipe we were going to try in Ottolenghi's Jerusalem would be great with caramelized onions instead of fried onions, so decided to make that instead.

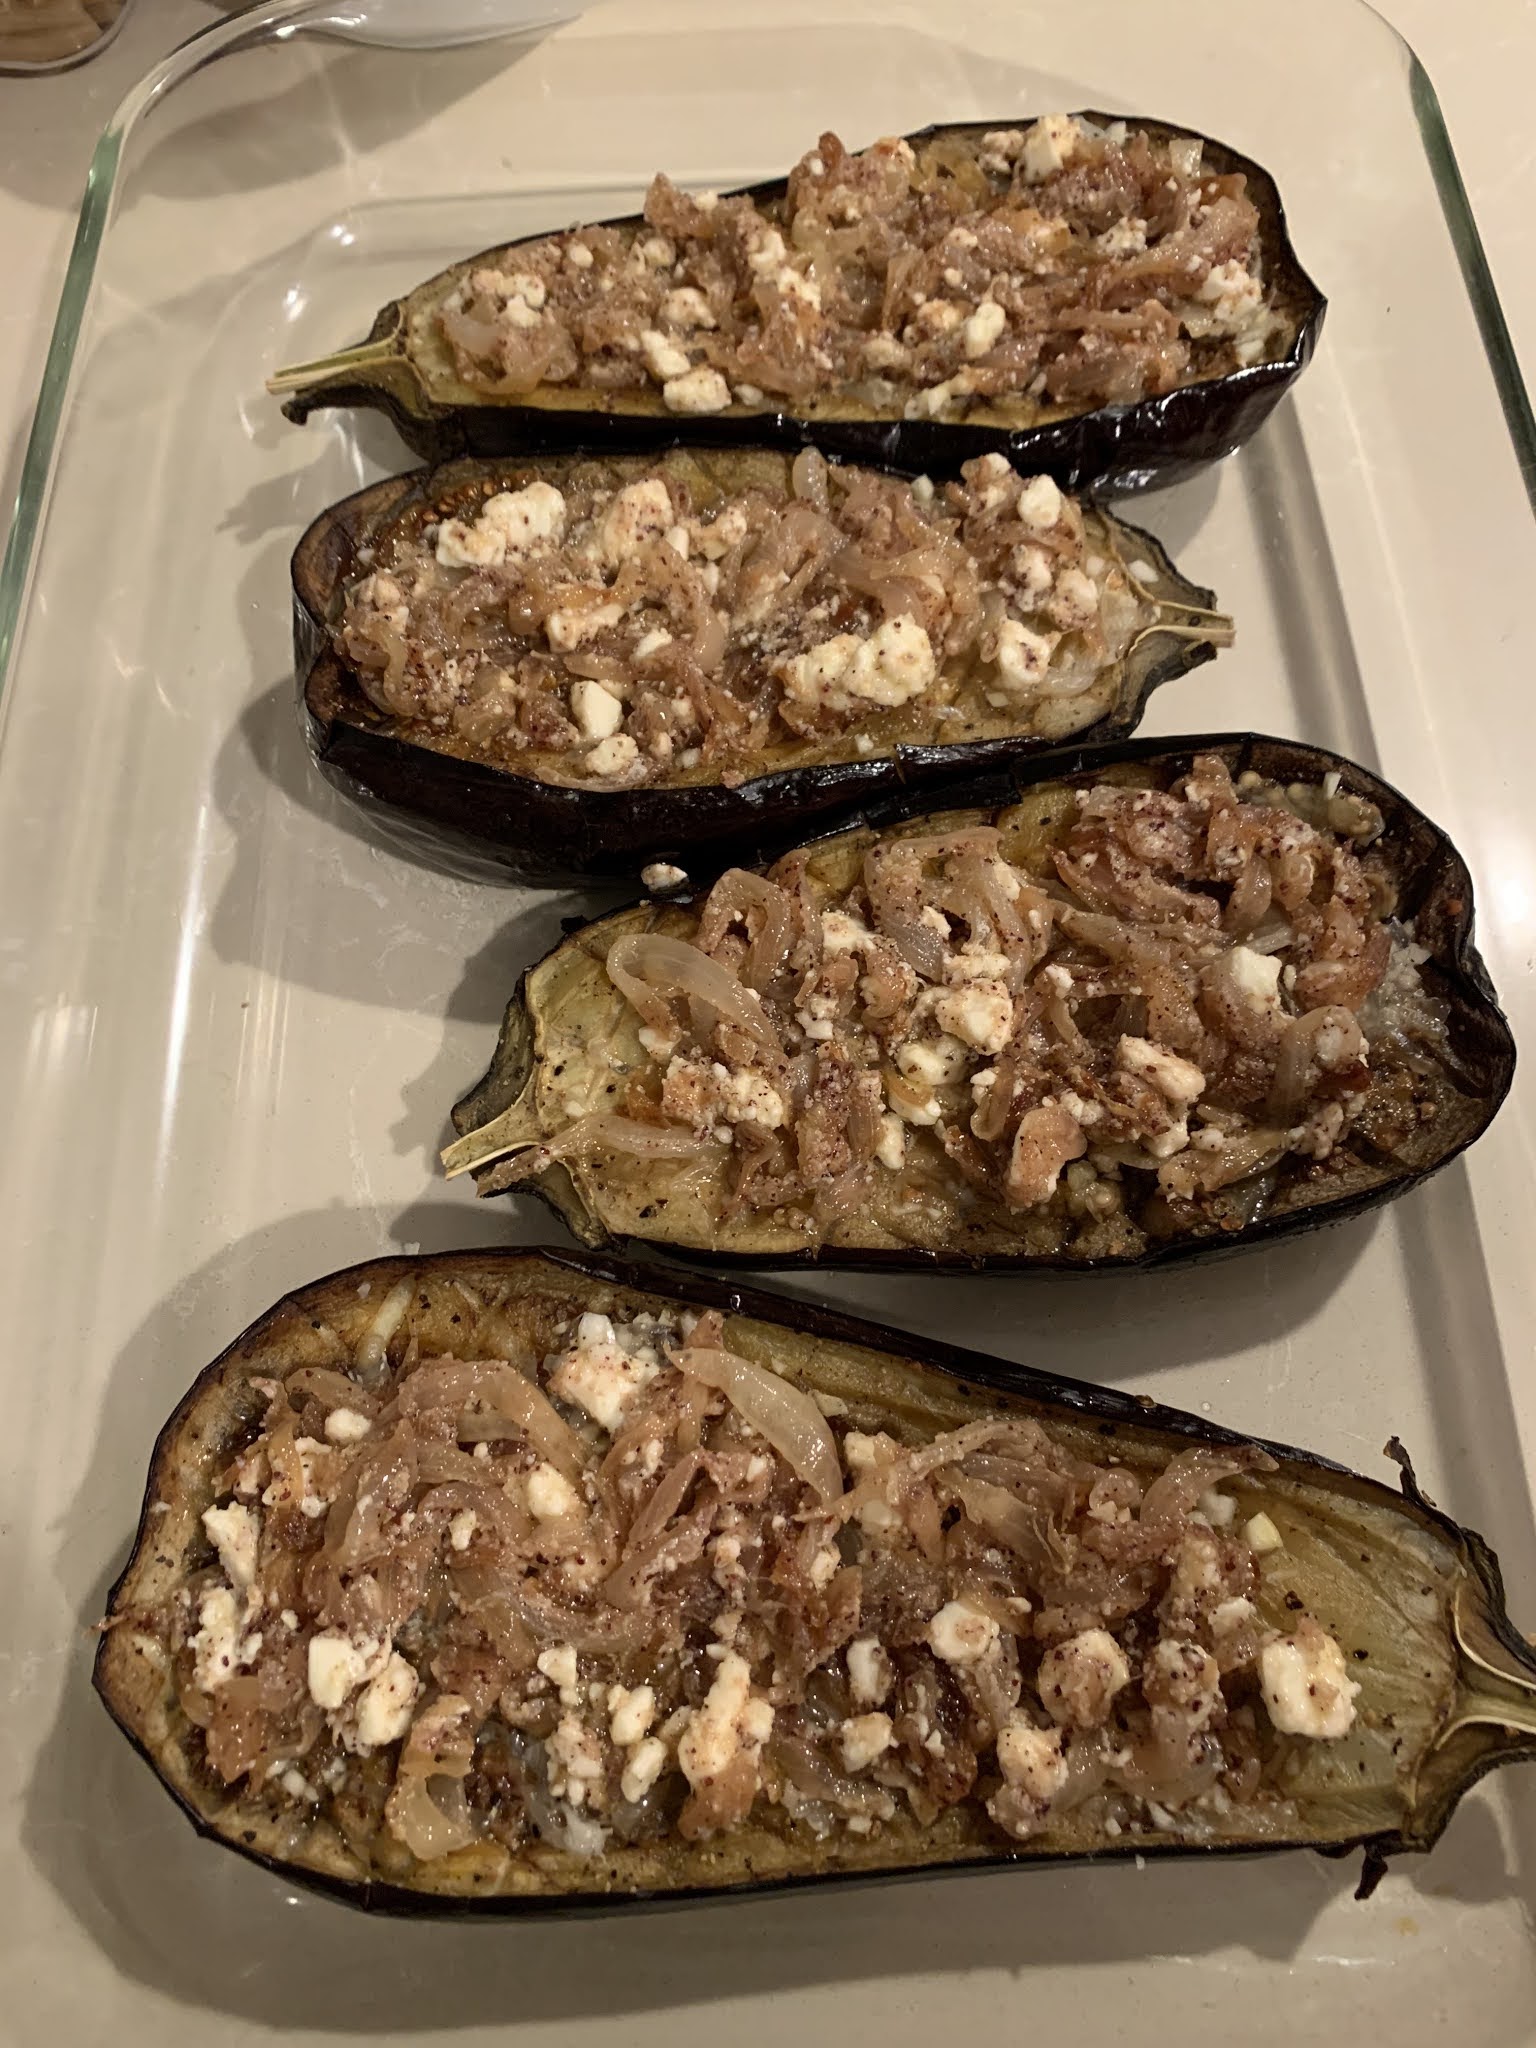
The recipe was for roasted eggplant with fried onion (here, caramelized onion) and chopped lemon. I was a little skeptical of the chopped lemon with raw garlic being added on top of the eggplant, thinking that both had some very strong and overpowering flavors, but I've trusted Ottolenghi many other times with combinations I didn't think I'd like, so I tried to follow the recipe as closely as I could (omitting the green chiles and substituting with just a dash of cayenne so it wouldn't be too hot for B).

The ingredients for the eggplant dish were:

- 2 large eggplants ($4.33)
- 2 tbsp + 1/2 cup olive oil ($1)
- 3 medium onions ($1.89)
- 1.5 tsp ground cumin ($0.10)
- 1 tsp sumac ($0.10)
- about 1/4-1/3 cup crumbled feta ($0.50)
- 1 lemon ($0.79)
- 2 cloves of garlic ($0.10)
- salt and freshly ground black pepper ($0.03)
- dash of cayenne pepper ($0.01)

We ate the eggplant alongside some turkey meatballs, since the recipe suggestion was to serve it with the turkey and zucchini burgers (which I made for a challenge in 2016). I had a feeling I was going to have enough to do with the constant monitoring of the caramelized onions that I wasn't going to have time to make something else from scratch (and I was right), so we just made some meatballs in the microwave that are one of our freezer staples from BJ's. The total for the eggplant was about $8.85, and the whole meal cost about $11.85 (not really sure how much each meatball portion cost). It was enough for the three of us for dinner, although maybe we would have been less full if B had actually liked the eggplant.


The steps for making the eggplant (our version with caramelized onions) were:

1. Slice onions into thin slices.

2. Heat 1-2 tbsp of olive oil over medium heat until shimmering. Add the onions and stir until coated with oil. Spread the onions evenly and let cook for 10 minutes.

3. While the onions are cooking, preheat the oven to 425 degrees. Wash the eggplants, and then halve lengthwise with the stem on.


4. Score the cut side of the eggplants with a criss-cross pattern, and then brush the cut sides with olive oil (the 1/2 cup). Sprinkle with salt and pepper. [Don't be me - I forgot to do the salt and pepper, and had to pull it back out of the oven a couple of minutes in to do it.]

5. Place the eggplants on a greased baking sheet cut side up, and put on the top rack of the oven. On the bottom rack, put a baking pan filled with a shallow layer of water to keep the eggplants from drying out.

6. Roast the eggplants for about 45 minutes until the flesh is golden and cooked.

7. After the onions have cooked for 10 minutes, add a little salt, stir around, and cook for at least an hour until caramelized. Stir every few minutes, letting them brown a little bit (but not burn) and then stirring, deglazing as needed. Adjust the heat if needed to prevent burning. [Ours took over an hour... That set dinner back a bit.]

That does not look like THREE onions

8. Once the onions are done, add the cumin, sumac, and cayenne pepper. Cook for 2 minutes, then add the feta, and cook for another minute before removing from heat.

9. Mince the garlic, and put in a small bowl to be combined with the lemon.


10. Remove the skin and pith from the lemon, and coarsely chop the flesh, removing the seeds, adding the flesh and juice into the bowl with the garlic. [This was the (paraphrased) instruction from the recipe. I had never done this before, so I wasn't sure if I needed to remove everything but the pulp. I ended up pulling out all the inside juice segments and adding them to the bowl, breaking them up with my fingers and squeezing out whatever juice I could. Where was the juice supposed to come from if you were chopping the lemon on a cutting board? This whole instruction confused me, and this was the first recipe in the book that didn't show the finished product so I couldn't examine that for hints.]

11. Assemble the eggplants in a serving dish when done, topping it first with the lemon and garlic mixture (rubbing it into the flesh a little bit), and then spooning over the onion-feta mixture.


The entire process of making this dish took me about 2 hours between the time it took to caramelize the onions (plus some extra time since there was some unexpected mold on the outside layer of the onions to deal with) and all the other tasks that just added up. Unfortunately, it wasn't an unqualified success. The onion-feta mixture was delicious. I could have eaten a giant bowl of that by itself, but three onions once caramelized became such a small bowl! (That's the worst part of caramelizing onions. You get so little when it's over.) The part I was most worried about - the lemon and raw garlic - worked really well with the eggplant and wasn't that overpowering for me, just a nice hit of garlic and citrus.


The eggplant, however, had tough skin (other than the middle) and some tough flesh near the stem and the cut parts of the skin, and I was just so disappointed. It wasn't as dry as the last time I made eggplant, but it wasn't what I hoped it would be, and the parts with tough, chewy skin just ruined the whole thing for me, so I ended up scraping out a lot and leaving the skin. A bite of soft skin from the middle with the tender eggplant and the onions and cheese and lemon and garlic all together was actually delicious, but there were so few of those perfect bites.


Would I make this again? The onion combination, maybe, although it took a while and would be easier to just saute it or roast it and then add those seasonings. The whole dish, probably not. Why can't I roast eggplant properly? Why was the skin so tough? I re-checked the recipe after dinner to make sure I hadn't messed up and wasn't supposed to also oil the outside skin of the eggplant, but it definitely only said to brush the cut side, so what did I need to do differently so that all the skin would be soft enough to eat? Also, B wasn't a fan of the eggplant at all, and I didn't even give him the skin, so I'd rather make something he likes better.

Jerusalem Cookbook Project Rankings:

4. Roasted eggplant with fried/caramelized onion and chopped lemon (pg 33) (if we were just ranking the onion mixture, this would be higher!)

Monday, November 30, 2020

Around the World Cooking Journey

As we explore our world through the Around the World Cooking Challenge (AtWCC), follow along on our adventures here!

Note: We acknowledge that a complete list of nations is not without controversy. As of the time of conception of this challenge, we are planning to cover 197 countries, 50 states, DC, and the 5 permanently inhabited territories of the USA. To figure out what counted as a "country" for these purposes, we looked to Sporcle and how they made the determination of what would be included in their countries of the world quiz. (We have no affiliation with Sporcle other than enjoying their quizzes.) We used that not because Sporcle is the ultimate authority on the matter, but mostly because (a) their explanation made sense, and (b) it's the list of countries that M committed to memory long ago. For more on their methodology, go here.

(Last updated 1/4/2024)

General Cooking Challenge Posts
Country #1: Afghanistan

USA #1: Alabama

USA #2: Alaska

Country #2: Albania

Country #3: Algeria

USA #3: American Samoa

Country #4: Andorra

Country #5: Angola

Country #8: Armenia

Country #35: Chile

Country #36: China
- Macau: minchi

Country #46: Denmark

Country #50: Ecuador

Country #63: Georgia

Country #64: Germany

USA #14: Hawaii

Country #74: Hungary

Country #76: India

Country #82: Italy

Country #84: Japan

Country #87: Kenya 

Country #94: Lebanon 

USA #21: Louisiana

Country #110: Mexico
(Oaxaca)

Country #116: Morocco

Country #138: Philippines
- Tortang giniling (beef omelette)

Country #139: Poland
- Golabki (cabbage rolls)

Country #149: Samoa

Country #169: Sweden

Country #175: Thailand

Country #180: Tunisia

Country #181: Turkey

Country #187: United Kingdom

Country #195: Yemen

Sunday, November 29, 2020

Week 46 - Seasonal

I love fall seasonal dishes, whether it's a warm, hearty stew or something often found on the table at Thanksgiving, like mashed potatoes, green bean casserole, or stuffing. I wasn't sure what to make for this challenge, but like some of the other challenges, somehow it found me instead. We had ordered delivery from Whole Foods, requesting a Napa cabbage to make some moo shu, and they messed up and sent us a green cabbage instead. Although we could have used it in the same dish, we had coleslaw mix left over from something else that worked better, so we were then left with a green cabbage. Not wanting it to go to waste even though we received it in error, what should we do with it? Cabbage rolls!


Cabbage rolls were one of those things we always thought about doing, but knew it would be a lot of work. We found a recipe on Pressure Cooking Today that seemed to make it a little simpler because it used the Instant Pot, but we knew this had to be a weekend project because it would take at least a couple of hours. (It took more than 3 hours.) Originally, I was thinking it could be a seasonal dish because it was warm and soupy and filled with comforting flavors, but after reading the Wikipedia entry, it seems like a common dish that many cultures serve near Christmas. Definitely appropriate for the seasonal challenge! Also, although cabbage rolls turn up in many cultures, these seem to line up most closely with the Polish version described there (meat and rice stuffed in a cabbage leaf with a tomato-based sauce), which is what we were thinking when we made it as well.

We only made a few variations to the original recipe, but no ingredients photo this time because we were just trying to get a lot of moving pieces going and didn't really have space on the counter with the Instant Pot already out. Also, even though I was sort of considering this for the seasonal challenge before we made it, I didn't actually decide on it until partway through. Anyway, the ingredients we used were:

For the cabbage leaves and filling:

- 1 box of Trader Joe's chickpea and red lentil risoni ($2.99)
- 1 large head of green cabbage (technically $0 because it was given to us in error, $1.77 if we had purchased it)
- 1 yellow onion, finely chopped ($0.79)
- 1/2 head of garlic, minced ($0.33)
- salt and freshly ground black pepper ($0.03)
- 1 package of Impossible Burger ($7.99)
- 1 flax egg ($0.08)


For the sauce:

- 2 tbsp butter ($0.18)
- 1 yellow onion, chopped ($0.79)
- 1/2 head of garlic, minced ($0.33)
- 2 cans (14.5 oz) of diced tomatoes with juice ($1.78)
- 8 oz can of tomato sauce ($0.50)
- 1/4 cup white vinegar ($0.10)
- large spoonful of chicken bouillon ($0.25)
- garlic powder ($0.03)
- freshly ground black pepper ($0.02)
- a tsp or so of Worcestershire sauce ($0.08)
- cornstarch and cold water ($0.10)

The total cost of the meal was about $18.14, which covered dinner for the three of us (although B didn't eat a ton of it) plus a bowl of leftovers for another day. Not the cheapest meal, but using Impossible Burger pretty much guarantees that since it's $8 by itself. Using ground turkey or some other ground meat would probably knock that total under $15, a more standard amount for our dinners, but we like splurging with Impossible Burger every once in a while.

To make the cabbage rolls, the first step was to get all of the components in motion. We made the risoni on the stove, cored the cabbage and then boiled it for 10 minutes, and then started on the sauce (melting the butter, adding the onion, then the garlic, then everything else other than the cornstarch-water mixture). This sounded simple, but as we expected it to, the cabbage preparation part took a while. Once it boiled (and cooled a little), we had to pull off the outer leaves. After boiling the rest some more, cooling and pulling off more leaves, some of the remaining leaves from the inside were chopped up and added to the sauce when it was done. That was the instruction from the recipe, although if I were to do this again, I would add all the remaining cabbage into the sauce. It came out so tender from the Instant Pot that I would definitely just throw it all in there if there were cabbage remaining. The last piece of preparing the cabbage leaves was something A picked up from YouTube, which was to pare down the stem a little bit to make them easier to fold and roll.


Once the cabbage leaves were ready, it was time to make the filling by combining about 60% of the risoni, the Impossible Burger, onion, garlic, salt, pepper, and the flax egg in a large bowl. When the filling was ready, it was time to roll! I don't know why I thought this would be the most time-consuming part. Once we got the technique down (add a couple tbsp of filling to the bottom stem part of the leaf, roll up once, roll both sides in, then keep rolling away from you, putting it seam-side down on a plate/cutting board when done), it went pretty fast. I also found it really meditative to do.


We didn't end up using all the filling in our 14 rolls, so the rest of it I just threw on the stove and made "burgers" to snack on while the Instant Pot worked. Since the filling was designed to be eaten inside cabbage with the sauce, it wasn't the most flavorful, and I probably liked it more than everyone else in the household. Maybe I just like the taste of Impossible Burger plain. Snack was that, plus some of the leftover risoni, plus some of the leftover cabbage which I just stir-fried for a little while.


Back to the cabbage rolls. It was time to fill the Instant Pot, and here, we followed the instructions carefully to make sure everything would cook correctly. We put the rack on the bottom of the pot, then added a cup of water, and put the first layer of rolls on the rack. It only fit six, but I did pick the six biggest ones. Next up was to cover them with about 1/3 of the sauce. The second layer of rolls was then added, alternating the direction from the first layer. The rest of the sauce was added on top and around the sides of the rolls, being careful not to go past the fill line. (We were close, but not past it.)


We set the Instant Pot to high pressure for 18 minutes, and then followed the instruction to unplug it and let it naturally release (although we did 10 minutes instead of 15) before doing the quick release. It took quite some time to come up to pressure, and the quick release sprayed more water out than usual, so maybe we should have waited the full 15 (but it was late and we wanted to get going).


Once the rolls were moved to a separate plate and the rack removed, the Instant Pot went back on, but this time on the saute function. The cornstarch-water mixture was added (twice, so no idea how much I used) to thicken the sauce while it boiled for about 10 minutes. We topped the cabbage rolls with the sauce, and dinner was finally served (near 11 pm)!


So, how did the cabbage roll experiment go? Really well, especially considering it was our first time making them. I think the only things we would do differently next time (besides starting earlier, as we're still getting used to estimating total time when using the Instant Pot) would be to: (1) season the filling a little bit more, maybe adding some garlic powder or other seasonings, and (2) add all of the remaining cabbage (chopped up) into the sauce. The tomatoes and cabbage in the sauce were so tender, and the flavor of the sauce was like tomato soup. So comforting for the season. The cabbage leaves were also super tender, and the whole dish really worked and would be so good with those two slight modifications. I don't know when we would make this again because of how labor-intensive and time-consuming it was (so I'm counting it for Poland for the AtWCC now), and also because B doesn't currently seem to be a fan of cabbage or Impossible Burger (has only really eaten it 1/4 of the time we've served it), but we (A&M) were really satisfied with the final product. 

Wednesday, November 25, 2020

Around the World Cooking Challenge Update

Writing this post about changes to our plans for the Around the World Cooking Challenge gave me a bit of deja vu. Our original plan had been to go alphabetically through the world (including the states of the United States), cooking each place as a unit and learning as we went. It was going to be a long process, but I liked the structure of going one unit at a time. After all, if we tried something in-between for another country and liked it, why wouldn't I want to make it again years down the line?

This sounded a lot like our original plan for WorldEats, except that was going geographically on a walk around the world instead of alphabetically. We were only going to count visits for each country when we were "doing" that country. Theoretically, it sounded like a good idea. In the first few units, for Canada, Cuba, and Jamaica, it forced us to visit places on our list that were further from home, places we had always wanted to go but were too lazy to plan visits to in advance, and the experience was really rewarding. (We were much more spontaneous diners then, not really schedulers or reservation people for the most part.) But there were so many good places along the way, many that are no longer with us, that deserved a place in the WorldEats exploration, so we revised it, gave up on the geographic walk, and decided to just count anything that felt "worthy" to us. 

Cuba WorldEats! One day, we will get around to posting about this cubano with yucca fries. We went to that restaurant two or three times, so it would be "fresh" when we wrote the post, but we never did...

Well, the same thing is happening again. I made some dishes that were really good and would absolutely, 100%, be part of the AtWCC if I had been up to that country's cuisine, so why not count it? I'm not throwing all the structure out the window, as I'm still generally following the alphabetical framework, but if things pop up in-between that should count for other countries, then they will.

What types of things would "count"? Not an exact science, but some ideas. First, if it's an iconic dish from a country's culture, or something really popular or widely eaten, or just something that would have come up in my research as a must-cook, then it should qualify. Second, if it turned out well enough that I would be satisfied with it if we were doing that unit, then it should qualify. Third, and the thing that kind of pushed me in this direction, if the dish were really labor-intensive, took a lot of time to make, and was more of a special project, then it should probably qualify. Last note, unlike WorldEats, I'm not going back in time to pull up every recipe I've ever made that would count, but just anything from the date we decided to do the AtWCC and forward.

These will count for Lebanon!


I made some Karelian pies for the Finnish challenge in the 52 week cooking challenge. Put nicely, they did not turn out well. I want to try making them again sometime when I would hopefully do a better job. I am not counting those.

I made shish tawook for the Lebanese challenge in the 52 week cooking challenge. (Yes, a lot of this challenge modification was prompted by themes from the 52 week cooking challenge.) The skewers were amazing, and while I would make these again without hesitation when we got up to Lebanon, we are still in A (and the beginning of the letter A), so it might be a while. I am counting that.

I made chicken zorbian for the Yemeni challenge in the 52 week cooking challenge. (I am many posts behind...) It turned out pretty well, Y is very far away in the alphabet, and it was a lot of work. I don't know if I would make it again when we got to Yemen, but part of that is because I could just order it for less than $20 on DoorDash from our local Yemeni restaurant. Theirs tastes better, and it supports someplace local. I am counting that.

This is from one of the A locations. What do you think it is?

So, where are we on the Around the World Cooking Challenge anyway? I am clearly very behind in posting about our culinary adventures, so it should come as no surprise that that applies here too. We started in A with Afghanistan and then moved on to Alabama. I think we're most of the way through Alabama with a couple remaining things we want to try, and then it'll be on to Alaska. As far as posting, we haven't done any of those, and the only posts on this challenge are just us talking about it and not cooking anything. Need to get on that. The next post about the challenge itself will be a running list of what we've done for the challenge (which should also be pinned in the sidebar), and you'll notice that the first entry there isn't for a place that starts with A at all. Hopefully we'll catch up on some of these cooking challenge posts before the year is out!