Not much to say about this one, as it was smoked salmon out of the package, scrambled Just Egg out of the container (if I've never mentioned it before, Just Egg is absolutely amazing, with the texture and feel of real eggs, and I'm so thankful it exists so that B can have scrambled eggs without actual eggs), and roasted potatoes with peppers and onions. It is representative of a local specialty though, and it made B happy because smoked salmon is one of his favorite things to eat. My estimate for the cost of this meal was somewhere around $15, but for dinner for three, that's more affordable than it would be getting this local specialty in a restaurant.
Monday, December 28, 2020
Week 40 - Local Specialty
One of the great things about NYC eating is that you can try food from so many different cultures and regions of the world. So what would be considered a local specialty? I had already done street cart-style chicken and rice for a previous challenge, and nothing else came to mind at first besides pizza and hot dogs, neither of which I really wanted to do. After thinking on it for a bit, I decided on lox, eggs, and diner-style potatoes. I would have done salmon, eggs, and a bagel, but then there wouldn't have been any vegetables for dinner.
Week 42 - Microwave
I make a lot of food in the microwave, so for the microwave challenge, I tried to think of something I hadn't made before that could be fully made in the microwave. I kept seeing mug cakes on Instagram, and somehow still hadn't made one, so that was perfect for this challenge. I pulled up a recipe for a vegan snickerdoodle mug cake from A Virtual Vegan, and hoped for the best!
Since I didn't know how the ingredients would respond to an attempt to bake in the microwave, I tried to stick closely to the recipe with only minor modifications. The ingredients I used were:
- 1.5 tbsp mixed nut butter ($0.37)
- just under 1 tsp vanilla extract ($0.05)
- 4 tbsp vanilla soy milk ($0.07)
- 3 tbsp sugar ($0.18)
- 6 tbsp all purpose flour ($0.07)
- about 1/4 tsp baking soda ($0.02)
- pinch of salt ($0.02)
- 1 tsp or so of ground cinnamon, divided ($0.08)
Not all of the measurements were exact. Some, like the cinnamon, I just added without measuring because it didn't matter if we had a little more, and others we couldn't be as precise because our teaspoons didn't go by quarters at the time. This mug cake snack cost about $0.86, which was great for a snack, and I was happy to see the low cost since a single serving cake really shouldn't cost very much.
Putting together the mug cake was relatively easy. The first step was to mix up the nut butter, vanilla extract, milk, and sugar, making sure to break up the nut butter as much as possible. Then everything else got added into the mug and stirred together. (Most of the cinnamon went into the cake, with just a little bit kept for sprinkling on top.) The instructions said to not over-mix, and to just stir until there was no more dry flour, but that took me a while.
The mug went into the microwave uncovered, and I took the recommendation to put it on a small plate in case of overflow. (It didn't even reach the top, so I guess I didn't need to worry.) It's been many months since I made this (so behind on challenge posts that it was still a few months later when I wrote the initial draft), but I think I cooked it in the microwave for about 60-75 seconds. It's ready when it's fluffy and puffed up, so I might have microwaved it a little too long since it didn't puff up as much as I was expecting it to and I kept trying to see if it would rise more. A little sprinkle of cinnamon on top, and it was done!
This was a fun afternoon experiment, and I could definitely see myself making a mug cake again. Often, I'll just get a craving for cookies or brownies or cake, and it's too late or too much effort to make one from scratch, so a single-serving mug cake would be perfect for those situations. Thankful for easy microwave snacks!
Sunday, December 27, 2020
Week 26 - Proofing
The folks behind the 52 week cooking challenge this year must have really wanted people to bake some bread, considering the themes for the first half of the year brought us from scratch (Week 17), flour (Week 21), and proofing (Week 26). We finally obtained yeast in June, and since we opened it up in the middle of our Afghanistan exploration of the AtWCC, it made sense to check off two boxes at once and make some Afghan bread for the proofing challenge.
We've loved the bread we've gotten at Afghan restaurants, and we always eat way too much of it when we're there. In addition to finding something that looked like that bread, I also needed to find a bread recipe that did not require egg. I found a recipe on Allrecipes for noni Afghani (aka naan), which looked kind of similar, and although it did have an egg on the ingredient list, it was only for an egg wash, for which I could substitute butter. After the lolo buns that turned into lolo cake, I could only hope that bread/yeast experiment #2 actually resulted in recognizable bread.
The ingredients for our version of the bread were:
- 1 tbsp sugar ($0.06)
- about 1.75 cups of water, divided ($0)
- 1 tbsp yeast ($0.20)
- 4 cups flour, plus extra for kneading and rolling ($0.90)
- 1.5 tsp salt ($0.03)
- 1/4 cup grapeseed oil ($0.60)
- 2 tbsp butter, melted ($0.18)
The recipe made 8 pieces of bread for $1.97, of which we had 2.5 left over at the end of dinner. We saved them to eat with another round of moqueca, and using A's microwaving techniques, they turned out pretty well.
Since the bread needed to proof, the entire process of making it took about 2.5 hours from start to plate. The steps for making the bread in our kitchen, mostly following the recipe but not entirely, were:
1. In a small bowl, combine 1 tbsp sugar with 1/2 cup of warm water. Stir.
2. Add the yeast on top, lightly stir, and allow it to stand for 10 minutes until foamy. [Depending on how small of a bowl you use, keep an eye on that yeast mixture. After 10 minutes, ours had risen to the top of the bowl, looking dangerously like it was going to overflow, and I had to rush through step 3 to make sure it didn't.]
3. In a large bowl, combine 4 cups of flour with 1.5 tsp salt.
4. Make a well in the middle, and pour in the yeast mixture along with 1/4 cup grapeseed oil. Set up two small bowls nearby with the rest of the water and a small amount of flour.
5. Mix well, adding the water in small amounts as needed until the dough is soft.
6. Knead the dough in the bowl (or not - at this point in the summer, I was still kneading everything in the bowl instead of on the counter) for 5 minutes. Add little bits of flour to the dough or your hands as needed while kneading until it's not too sticky.
7. Cover the bowl with plastic wrap and allow to rise for about 1.5 hours.
8. Preheat oven to 350 degrees after the proofing time, and melt the butter.
9. Deflate the dough. [Since we really had no bread experience at this point, we had to look this up, and were very amused that it was really just firmly and gently pushing on it. It was also fun to do!] Divide into 8 pieces and roll into balls.
10. On a lightly-floured surface, roll the balls out into ovals about 1/2 inch thick. [I am not good at rolling into defined shapes. They just roll into whatever. I tried redoing one of them to make it a better oval and that might have been the worst one of the bunch.]
11. Draw 3 lines on top of each piece, and move the bread to lightly-oiled baking sheets. Brush with the melted butter.
12. Bake for about 20-25 minutes, and then remove from oven.
We needed two baking sheets to do this. The first baking sheet, which baked closer to 20-22 minutes on the top shelf, came out soft and fluffy. The second one ended up closer to the heat and also in the oven for longer because I was doing other things, making that one a little bit crunchier in parts. I was initially disappointed because it wasn't like the ones we had from our favorite Afghan restaurant in look or in taste, but it was never going to be, since they probably make theirs on a grill or in a tandoor, which we can't do. I felt like it was a little bland and didn't even taste the butter at first, but as I ate more of it, the butter came through, I really enjoyed the fluffiness of the bread, and it grew on me. A liked it, and B made it a primary part of his dinner (but then again, the kid usually loves bread), so I guess it was a success. I'd make it again, but maybe only half the amount so we don't fill up on bread alone.
We've loved the bread we've gotten at Afghan restaurants, and we always eat way too much of it when we're there. In addition to finding something that looked like that bread, I also needed to find a bread recipe that did not require egg. I found a recipe on Allrecipes for noni Afghani (aka naan), which looked kind of similar, and although it did have an egg on the ingredient list, it was only for an egg wash, for which I could substitute butter. After the lolo buns that turned into lolo cake, I could only hope that bread/yeast experiment #2 actually resulted in recognizable bread.
The ingredients for our version of the bread were:
- 1 tbsp sugar ($0.06)
- about 1.75 cups of water, divided ($0)
- 1 tbsp yeast ($0.20)
- 4 cups flour, plus extra for kneading and rolling ($0.90)
- 1.5 tsp salt ($0.03)
- 1/4 cup grapeseed oil ($0.60)
- 2 tbsp butter, melted ($0.18)
The recipe made 8 pieces of bread for $1.97, of which we had 2.5 left over at the end of dinner. We saved them to eat with another round of moqueca, and using A's microwaving techniques, they turned out pretty well.
Since the bread needed to proof, the entire process of making it took about 2.5 hours from start to plate. The steps for making the bread in our kitchen, mostly following the recipe but not entirely, were:
1. In a small bowl, combine 1 tbsp sugar with 1/2 cup of warm water. Stir.
2. Add the yeast on top, lightly stir, and allow it to stand for 10 minutes until foamy. [Depending on how small of a bowl you use, keep an eye on that yeast mixture. After 10 minutes, ours had risen to the top of the bowl, looking dangerously like it was going to overflow, and I had to rush through step 3 to make sure it didn't.]
3. In a large bowl, combine 4 cups of flour with 1.5 tsp salt.
4. Make a well in the middle, and pour in the yeast mixture along with 1/4 cup grapeseed oil. Set up two small bowls nearby with the rest of the water and a small amount of flour.
5. Mix well, adding the water in small amounts as needed until the dough is soft.
6. Knead the dough in the bowl (or not - at this point in the summer, I was still kneading everything in the bowl instead of on the counter) for 5 minutes. Add little bits of flour to the dough or your hands as needed while kneading until it's not too sticky.
7. Cover the bowl with plastic wrap and allow to rise for about 1.5 hours.
8. Preheat oven to 350 degrees after the proofing time, and melt the butter.
9. Deflate the dough. [Since we really had no bread experience at this point, we had to look this up, and were very amused that it was really just firmly and gently pushing on it. It was also fun to do!] Divide into 8 pieces and roll into balls.
10. On a lightly-floured surface, roll the balls out into ovals about 1/2 inch thick. [I am not good at rolling into defined shapes. They just roll into whatever. I tried redoing one of them to make it a better oval and that might have been the worst one of the bunch.]
11. Draw 3 lines on top of each piece, and move the bread to lightly-oiled baking sheets. Brush with the melted butter.
12. Bake for about 20-25 minutes, and then remove from oven.
We needed two baking sheets to do this. The first baking sheet, which baked closer to 20-22 minutes on the top shelf, came out soft and fluffy. The second one ended up closer to the heat and also in the oven for longer because I was doing other things, making that one a little bit crunchier in parts. I was initially disappointed because it wasn't like the ones we had from our favorite Afghan restaurant in look or in taste, but it was never going to be, since they probably make theirs on a grill or in a tandoor, which we can't do. I felt like it was a little bland and didn't even taste the butter at first, but as I ate more of it, the butter came through, I really enjoyed the fluffiness of the bread, and it grew on me. A liked it, and B made it a primary part of his dinner (but then again, the kid usually loves bread), so I guess it was a success. I'd make it again, but maybe only half the amount so we don't fill up on bread alone.
Saturday, December 26, 2020
Week 47 - Mushrooms
We love mushrooms and eat them often, so for the Week 47 challenge focused on mushrooms, I went looking for mushrooms made in a style that we hadn't tried before. I found a quick mushroom recipe on The Kitchn for buttered balsamic mushrooms, and that sounded like a good addition to our Thanksgiving-style dinner.

The ingredients were:
- about 1 tbsp olive oil ($0.10)
- 2 shallots ($0.98)
- 2 tbsp butter ($0.18)
- 2 boxes of cremini mushrooms ($4.58)
- salt & pepper ($0.02)
- dried rosemary ($0.08)
- dried thyme ($0.08)
- 2 tbsp balsamic vinegar ($0.18)
- heaping tbsp of brown sugar ($0.08)
- 1 tbsp soy sauce ($0.10)
- 1 large spoonful of garlic ($0.05)
The cost for the mushrooms was about $6.43, with the bulk of the cost from the mushrooms and the shallots. We ate them with some green beans ($0.95), cathead biscuits ($3.34), and the Trader Joe's breaded turkey-less stuffed roast with gravy ($12.99). The entire dinner cost about $23.71, more than our usual challenge meals (or dinners generally), but it was our pre-Thanksgiving feast (since we ordered a catered one for actual Thanksgiving day). We had leftovers for lunch the next day (roast and biscuits), and then some more roast for dinner, so the cost was spread out a little bit more.
The steps for making the mushrooms were:
1. Prep - wash and slice mushrooms; chop shallots.
2. Heat olive oil over medium heat. Add shallots, and cook until starting to soften.
3. Add the butter and melt.
4. Add the mushrooms, and cook until they start releasing juice, stirring often. Add salt, pepper, and about 1/2-1 tsp (didn't measure) of rosemary and thyme, rubbing the dried herbs in your hands before adding. [The seasonings were supposed to be added with the mushrooms, but I forgot until a few minutes later. It was fine. Also, had never heard the tip about rubbing the herbs before, but it makes sense.]
5. Once the mushrooms have started releasing juice, lower heat to medium low, and add the balsamic, brown sugar, soy sauce, and garlic.
6. Cook until the mushrooms are soft and the sauce has reduced.
The mushrooms were delicious, with lots of flavor from the garlic and herbs. The rosemary and thyme were much stronger than I was expecting, but maybe I should have been rubbing the spices in my hand all along before adding them to dishes! These mushrooms were a perfect accompaniment for this Thanksgiving feast, and I would gladly make these again as a vegetable side dish.
Friday, December 25, 2020
Week 21 - Flour
The Week 21 challenge, flour, got postponed for over a month. Originally, my plan for the "from scratch" challenge was to make focaccia, but I pushed that back to the flour challenge once that was announced because it seemed to fit better there. We were waiting on yeast anyway at the time, so it didn't really matter where we put it. For my first time making focaccia, I decided to follow a recipe I found on Inspired Taste for an easy rosemary garlic focaccia bread. Easy sounded good since I was (and still am) a novice bread maker.
[Note: I made this back in July, and it was our third time baking with yeast, so we still didn't really know what we were doing. Initially, I wanted to post our bread/yeast adventures in order, but who cares about order anymore as the end of the year approaches? I'll admit that it's a little strange finishing and editing this post I started back in July now that we know so much more about bread, and also having recently posted about baking a loaf of bread, but I guess I should just try posting more timely...]
The ingredients for the focaccia were:
- 1/2 cup of olive oil, plus extra for oiling the bowl and baking pan ($1)
- 1 spoonful of minced garlic ($0.10)
- garlic powder ($0.03)
- rosemary ($0.10)
- thyme ($0.10)
- freshly ground black pepper ($0.02)
- just under 1 tbsp of yeast ($0.19)
- one small squeeze of honey ($0.10)
- 2.5 cups of flour, divided, plus extra for flouring surface/hands ($0.47)
- 1 cup of warm water ($0)
- 1/2 tsp of salt ($0.01)
The cost of the focaccia was approximately $2.12. I don't think I had ever realized how inexpensive it was to make your own bread. Paying with your time and labor, I guess! We paired the focaccia with a simple pasta dish with spinach and turkey meatballs, so my estimate for dinner (without knowing the exact costs of any of those) would be somewhere around $10. Not bad for a lot of food.
3. Add 1 cup of flour and 1/4 cup of the infused oil to the bowl with the yeast. Stir and let sit for at least 5 minutes. Make sure the oil is cool before being added so it doesn't kill the yeast.
4. Add 1.5 cups of flour and the salt. Stir until mixed together and a dough has formed.
5. Knead on a floured surface (I did it in the bowl, adding flour to the outside of the dough and my hands, maybe not the best idea looking back) about 10-15 times. [Ours felt really wet and sticky. Knowing what I know now after taking some bread-making classes, I should have tried adding more flour before kneading.]
6. Oil a large bowl. Put the dough in the bowl, cover tightly with plastic wrap, and let sit for 1 hour so it can rise.
7. Preheat oven to 450 degrees. Using a 9x13 baking pan or dish with tall sides, grease the pan with 2 tbsp of the olive oil mixture. If not oiled enough, add some regular olive oil.
8. Transfer dough to pan, press down to the edges, and then dimple the dough with your fingers.
9. Top the dough with the rest of the infused olive oil, and then let the pan sit for 20 minutes for the dough to rise again. [Not sure ours did.]
10. Bake for 15 minutes. Remove and cool on wire rack.
- 1/2 cup of olive oil, plus extra for oiling the bowl and baking pan ($1)
- 1 spoonful of minced garlic ($0.10)
- garlic powder ($0.03)
- rosemary ($0.10)
- thyme ($0.10)
- freshly ground black pepper ($0.02)
- just under 1 tbsp of yeast ($0.19)
- one small squeeze of honey ($0.10)
- 2.5 cups of flour, divided, plus extra for flouring surface/hands ($0.47)
- 1 cup of warm water ($0)
- 1/2 tsp of salt ($0.01)
The cost of the focaccia was approximately $2.12. I don't think I had ever realized how inexpensive it was to make your own bread. Paying with your time and labor, I guess! We paired the focaccia with a simple pasta dish with spinach and turkey meatballs, so my estimate for dinner (without knowing the exact costs of any of those) would be somewhere around $10. Not bad for a lot of food.
The steps to make "easy" focaccia were:
1. In a small skillet, heat 1/2 cup of olive oil with the minced garlic, garlic powder, rosemary, thyme, and black pepper over low heat for about 5 minutes, constantly stirring and making sure the garlic doesn't burn. Remove from heat and allow to cool to room temperature.
2. In a large bowl, mix the warm water, yeast, and honey. Stir and allow to sit for 5 minutes.
1. In a small skillet, heat 1/2 cup of olive oil with the minced garlic, garlic powder, rosemary, thyme, and black pepper over low heat for about 5 minutes, constantly stirring and making sure the garlic doesn't burn. Remove from heat and allow to cool to room temperature.
2. In a large bowl, mix the warm water, yeast, and honey. Stir and allow to sit for 5 minutes.
3. Add 1 cup of flour and 1/4 cup of the infused oil to the bowl with the yeast. Stir and let sit for at least 5 minutes. Make sure the oil is cool before being added so it doesn't kill the yeast.
4. Add 1.5 cups of flour and the salt. Stir until mixed together and a dough has formed.
5. Knead on a floured surface (I did it in the bowl, adding flour to the outside of the dough and my hands, maybe not the best idea looking back) about 10-15 times. [Ours felt really wet and sticky. Knowing what I know now after taking some bread-making classes, I should have tried adding more flour before kneading.]
6. Oil a large bowl. Put the dough in the bowl, cover tightly with plastic wrap, and let sit for 1 hour so it can rise.
7. Preheat oven to 450 degrees. Using a 9x13 baking pan or dish with tall sides, grease the pan with 2 tbsp of the olive oil mixture. If not oiled enough, add some regular olive oil.
8. Transfer dough to pan, press down to the edges, and then dimple the dough with your fingers.
9. Top the dough with the rest of the infused olive oil, and then let the pan sit for 20 minutes for the dough to rise again. [Not sure ours did.]
10. Bake for 15 minutes. Remove and cool on wire rack.
Looking back at this bread experiment (which, as I mentioned, was the third time using yeast after the fun coconut buns/coconut cake experiment, and then some Afghan naan), I really had no idea what I was doing. I still consider myself a beginner at making bread, but I've learned a lot from some really knowledgeable people in the interim, so I kind of wish I had finished writing this post before that so I could see how far I've come. That night after I made the focaccia, I went reading other recipes and comments on how to make focaccia, and came across people using dough hooks and stand mixers, and they were testing their dough with the windowpane test. I hadn't done any of that, and I didn't even understand what the windowpane test was (I do now!), but something at the time told me that my focaccia hadn't come out quite right, didn't really rise enough, or some other issue that I couldn't identify, which is why I ended up researching. My guess now is that the dough wasn't the right consistency at the kneading step (probably needed more flour), and probably wasn't kneaded enough. No way I'm going to know unless I try it again sometime, and since I love focaccia, I probably will.
Technique aside, how was the bread itself? It was delicious! Maybe it wasn't as fluffy as restaurant or bakery focaccia, but the infused olive oil had great flavor and we all liked the bread. Even if it wasn't perfect, I was happy with how it turned out. Definitely want to give focaccia another try sometime.
Week 50 - Sage
I love sage, but it was difficult to choose a recipe for the Week 50 challenge because sage isn't usually the spotlight ingredient whenever I use it, even if it does play an integral part in the flavors of a dish. I originally thought about baking some chickpea sage fries, but when I went to read the recipe an hour or so before dinner, I saw that the batter was supposed to chill in the fridge for a few hours before frying (or, in my plan, baking), so that wasn't going to work. I was lukewarm on making the fries in the first place, so instead of trying that another day, I went back to search for more sage recipes. That's when I found a recipe for sweet onion sage bread on Kitchen Divas, and decided that would be a better fit for us.
The ingredients that ended up going into the bread were:
- 1 red onion ($0.77)
- a few tsp of dried sage ($0.10)
- freshly ground black pepper ($0.02)
- olive oil (not measured, used in several instances) ($0.40)
- 2-1/4 tsp yeast (equivalent of one packet) ($0.40)
- 1/2 tbsp sugar ($0.06)
- 3/4 cup warm water ($0)
- 2-1/2 cups all purpose flour, plus more for kneading (another cup or so) ($0.40)
- 1 tsp salt ($0.02)
- olive oil cooking spray ($0.15)
- Herbes de Provence ($0.20)
- a few grinds of salt ($0.02)
You might notice that there are two onions in that ingredient photo while the ingredient list only mentions one. When I started, I was following the measurements in the original recipe, but it just seemed like such a big recipe, using two packets of yeast and five cups of flour, so I decided after already chopping the onions to cut the recipe in half. The total cost for the bread was a little more than $2.50, which is pretty good considering how much bread it made. We ate it with plant-based breakfast sausage and some vegetables (zucchini, carrots, and the other chopped red onion), each of which cost approximately $4, so it was about $10.50 for a lot of food.
I generally followed along with the steps in the recipe, also using some techniques and tips we picked up from some of our bread-baking classes this fall. The steps for making our version of the bread were:
1. Prep - finely chop red onions.
2. In a skillet over medium heat, add some olive oil, and once hot, add onions, dried sage, and some black pepper. Cook until onions are soft and then set aside to cool.
3. In a small bowl, add the yeast, sugar, and warm water. Stir and then let sit for about 10-15 minutes. (It should be frothy and growing.) After that, add about 1/2 tbsp of olive oil.
4. In a large mixing bowl, combine the flour and salt. Then add the yeast mixture and onions, and mix well, making adjustments of water/flour until texture is ready for kneading. (I added a little water.)
5. Put dough on a flour-dusted surface and knead for at least 5 minutes, adding flour or water as needed. (I kneaded it for 15, adding a little bit of flour each time as I kept going along, totaling probably around one cup. I don't know how to explain how I decided when to stop, but it was based on the stickiness and stretchiness of the dough. I also used the windowpane test.)
6. Spray the inside of a big bowl with olive oil cooking spray, put dough in the bowl, flip over, and spray the top with more cooking spray. Cover with plastic wrap (also sprayed with cooking spray on the inside). Set aside to proof for 45-50 minutes until it doubles in size. (I used the microwave as bread proofer here, and after trying that a month or so ago, we haven't done it any other way.)
7. Once dough has doubled in size, punch it down gently, divide it into 2 pieces, and shape into loaves. (Even though I was only making half of the recipe, I still separated it in two.)
8. Grease a rimmed baking sheet, add loaves, and brush loaves with enough olive oil to cover them.
9. In a small bowl, combine a few grinds of freshly ground black pepper, a few grinds of salt, and a few spoonfuls of Herbes de Provence, and mix well. Sprinkle over loaves, and then let loaves sit uncovered for another 30 minutes to rise.
10. Preheat oven to 350 degrees. Bake loaves for about 30 minutes. (We checked the temperature to see if it was 190 degrees at that point, and it was more. The original recipe said to leave it until the crust was golden brown. Ours didn't get that golden, but we pulled it out anyway.)
11. Remove loaves and cool on wire rack.
I loved the texture of this bread. It came out so soft, which was good for me, because I like soft bread more than bread with a harder crust. Each slice was soft, pillowy, and so full of olive oil and herbs in flavor. It was like biting into bread that had been dipped in olive oil and herbs, but without the actual dipping. I was having memories of Carrabba's (haven't been there in years since they closed the one near my parents) and their delicious bread, olive oil and herb mix, and it reminded me so much of that. As far as the challenge, you could taste the sage as part of the herb mix, but I don't think I would say that the bread tasted strongly of just sage.
This bread was so delicious that A and I definitely ate more calories in bread than we were planning to, but it was so hard to stop eating, especially knowing that freshly baked bread tastes so much better right out of the oven than out of the fridge or freezer (although it was pretty good out of the fridge the next day too). I'm still amazed that I baked a real loaf of bread, something that I would have never expected to say if you asked me a year ago. (But who would have predicted 2020 last year?) I've come a long way since my first yeast experiment with the lolo buns (that turned into a cake) earlier this year, and I'm still shocked that this was made with my own two hands. I would definitely make this bread again.
Thursday, December 24, 2020
Week 49 - 30 Minutes
If you've been reading cooking posts here for any length of time, you probably already know that I have speed issues with cooking. That's why I like when challenges like the Week 49 challenge, 30 minutes, come up, because I can challenge myself to get faster. They've done this challenge before, and back in 2016, I did finish the entire meal in 30 minutes, but it was largely done by using shortcuts (frozen roasted corn, protein was just pre-seasoned panko chicken tenders in the oven, etc). This time, I decided to pick a meal from scratch that was only supposed to take 30 minutes (including prep time) to see if I could do it.
I chose a teriyaki chicken stir-fry from Well Plated, which was supposed to be 15 minutes of prep time and 15 minutes of cooking. Since you can use whatever vegetables you want in a stir-fry, I thought there was a good chance it would take me longer than 30 minutes total even though I tried to pick some simpler vegetables, but I still wanted to give it a go.
The ingredients for the stir-fry were:
- 1/2 cup water ($0)
- 1/3 cup soy sauce ($0.50)
- about 3 tbsp honey ($0.69)
- about 1 tbsp rice vinegar ($0.10)
- big spoonful of minced garlic ($0.15)
- equivalent amount of ginger ($0.30)
- about 1 tbsp sesame oil ($0.30)
- big scoop of cornstarch ($0.25)
- 1 yellow onion ($0.61)
- 1 green pepper ($1.06)
- 1 red pepper ($1.56)
- small batch of scallions ($0.99)
- small bag of snap peas ($3.99)
- 1 package of extra firm tofu ($1.89)
- grapeseed oil for stir-frying ($0.10)
- 2 Bibigo microwavable sticky rice packets ($2.25)
The total cost for the dish was approximately $14.74, a little higher than I would have expected for this vegetarian dish, but almost a quarter of that was the snap peas alone.
Making the dish was relatively straightforward as we've made many stir-fries before. I often just stir-fry the protein and vegetables and then toss sauce ingredients on top of it in the wok, but since this one called for the teriyaki sauce to be made on the stove, I tried it that way instead. The water, soy sauce, honey, rice vinegar, garlic, ginger, and sesame oil get mixed in a small pot on the stove, and then once boiling, a slurry of cornstarch and water is added to thicken it up. Unfortunately, when I threw the cornstarch slurry into the sauce, I didn't whisk it fast enough (I think I was doing multiple things at once), and when I got back to it, the sauce had formed giant gelatinous-like clumps. Oops. I was able to improve it and break some of that down a little bit, but even when the sauce was added to the wok, there were some jelly-like bits that we sometimes mistook for onions.
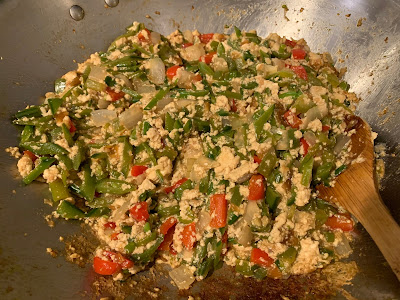
Anyway, the sauce was made in the pot, while the tofu and vegetables were cooked in the wok, and then the sauce was added at the end. The original plan had been to stir-fry the tofu, remove it from the wok, then cook the vegetables, and then add the tofu back in with the sauce, but there was something wrong with this tofu. I bought extra-firm on purpose so that it would be more likely to stay intact when sliced and stir-fried and not crumble like soft tofu, but this package of tofu crumbled more than any firm tofu we've used recently. The last package of 365 firm tofu that we made a week earlier was super firm, so I was looking forward to using the extra-firm and having it be even sturdier. Nope. It was significantly less firm and crumbled when I was slicing it. Just this batch? Mislabeled? Who knows, but it was like having scrambled tofu which was the exact opposite of what I was trying to do. We liked the dish overall and the sauce was good, but it would have been so much better with recognizable slices of tofu.
As far as the 30 minute challenge, how did it go? It took 58 minutes. At the 30 minute mark, there was still nothing in the wok, but I think I could have cut the time a little bit if not for a few things that slowed me down:
- The red pepper and green pepper we got from Whole Foods were a little old. The red pepper had some softer spots, and the green pepper had a gash in the side and a giant soft spot, so I had to chop them more carefully and slowly than I would have if they were in great condition.
- I wasn't expecting to have crumbly tofu sticking to the wok, which then couldn't be set aside for the vegetables, which also meant that the vegetables couldn't cook as quickly on their own in the wok.
- Breaking down the mountains of cornstarch in the sauce took a while, and if I had whisked it well enough from the start, that would have eliminated some time.
In the end, it was still under an hour, which was good for me, even for a straightforward stir-fry. We liked how it turned out, other than the tofu, but the tofu wasn't the fault of the recipe. (Seriously, how could that have been extra firm?) I would make this sauce for a stir-fry again.
Week 13 - Deep Frying
I wasn't planning to participate in the Week 13 challenge when it was first announced as deep frying. Back when the same challenge came up in 2016, I mentioned that I don't deep fry at home for a whole bunch of reasons (health, safety, convenience). At that point, I was really trying not to skip any weeks, so I substituted shallow frying for deep frying instead. When I returned to the challenge this time around, I gave myself permission to skip any weeks I just didn't feel like doing, so I figured deep frying would just be one of those.
I did consider taking something that usually gets deep fried and baking it instead, but after remembering my many, many failures at that (onion ring attempt, Scotch eggs attempt, mozzarella sticks attempt #1, mozzarella sticks attempt #2), I decided against it. It would be one thing if it was just me eating it, or me and A (who eats everything), but I didn't want to make baby B suffer through something terrible. He's still developing his taste buds, and if it were something awful, he might never want to try that thing again! Plus, we couldn't use eggs in the breading and dredging process, so what would I even make?
That was the decision I made back in March, but fast-forward a couple months to June. As part of our AtWCC exploration of Afghan dishes, I wanted to try making some bolani, a flatbread/turnover-type thing usually filled with potatoes, pumpkin, or assorted vegetables. We had eaten these before at the Afghan restaurant near our old apartment (one day, we'll write about that for WorldEats...), and they were definitely very fried and crispy. If I was going to take something typically deep-fried and try to make it as a baked dish, then I might as well count this for the deep frying challenge! As for our other concerns, egg wouldn't be necessary to make these, and I planned to keep some of the filling separate to give to B in case the actual bolani turned out to be a disaster. As for my concerns about dredging failures, I guess I just keep trying, because I made those crunchy onion rings later in the summer.
I did consider taking something that usually gets deep fried and baking it instead, but after remembering my many, many failures at that (onion ring attempt, Scotch eggs attempt, mozzarella sticks attempt #1, mozzarella sticks attempt #2), I decided against it. It would be one thing if it was just me eating it, or me and A (who eats everything), but I didn't want to make baby B suffer through something terrible. He's still developing his taste buds, and if it were something awful, he might never want to try that thing again! Plus, we couldn't use eggs in the breading and dredging process, so what would I even make?
Our inspiration: bolani at Ariana Afghan Kebab Restaurant in Hell's Kitchen
That was the decision I made back in March, but fast-forward a couple months to June. As part of our AtWCC exploration of Afghan dishes, I wanted to try making some bolani, a flatbread/turnover-type thing usually filled with potatoes, pumpkin, or assorted vegetables. We had eaten these before at the Afghan restaurant near our old apartment (one day, we'll write about that for WorldEats...), and they were definitely very fried and crispy. If I was going to take something typically deep-fried and try to make it as a baked dish, then I might as well count this for the deep frying challenge! As for our other concerns, egg wouldn't be necessary to make these, and I planned to keep some of the filling separate to give to B in case the actual bolani turned out to be a disaster. As for my concerns about dredging failures, I guess I just keep trying, because I made those crunchy onion rings later in the summer.
[Side note: You might notice I mentioned June above. I wrote the initial draft of this a very long time ago, and that also gives some idea of how long ago we started cooking for the AtWCC. My plan had been to write our Afghanistan WorldEats posts and then publish the AtWCC posts for Afghanistan in the order we made the dishes to better reflect our cooking "journey," but none of that has happened yet, it's the end of December, and it's time to get as many challenge posts out there as possible before the end of the year!]
I started with a recipe I found on V for Veggy, and made some adjustments (ingredients, but most notably, baking instead of deep frying). The ingredients we used were:
for the dough:
- 2.5 cups all-purpose flour ($1)
- 1 tsp salt ($0.02)
- 1.5 tsp olive oil ($0.15)
- 1 cup water ($0)
for the dough "process":
- flour for work surface ($0.05)
- olive oil coating for mixing bowl ($0.10)
- small bowl of water for adding to the dough while kneading ($0)
for the filling:
- 2 russet potatoes ($1)
- 6 scallions ($0.65)
- 1/2 bag frozen spinach ($0.75)
- ground coriander ($0.15)
- garlic powder ($0.05)
- ground cumin ($0.15)
- salt and pepper ($0.05)
for the yogurt sauce:
- 1 cup plain Greek yogurt ($1.38)
- a lot of garlic powder ($0.10)
- a little salt ($0.02)
- small batch of mint (about 1/3 cup chopped) ($1)
One thing I will say about this recipe was that it was very budget-friendly. Dinner for the three of us was approximately $6.62. We haven't seen a challenge meal come out that affordable in a long time.
This was a labor-intensive recipe, which I knew going into it. I figured it would take at least 1.5-2 hours. Unfortunately, we got a late start, and it did edge slightly over the 2 hour mark, but considering how slow my pace usually is, it was better than it could have been. The steps for making the baked bolani were:
1. Combine ingredients for dough in large bowl.
2. Knead dough until it's soft, smooth, and not sticky. [The recipe had really good time estimates here, and was exactly right that it would take 10 minutes. I would periodically wet my fingers to add a little more water to the dough when kneading, so it was probably a little more than a cup of water in the end.]
3. Coat the mixing bowl with olive oil, and cover dough with a wet towel. Proof for an hour.
4. While dough is proofing, prep potatoes (peel, chop, boil, and mash), chop scallions, and chop mint.
5. Make yogurt sauce while potatoes are cooking by combining all ingredients. Chill until ready to eat.
6. Make mashed potatoes by combining all ingredients for filling and seasoning to taste.
7. Divide dough into 8 portions, roll out into large circles on a floured work surface, and spread the filling on half of the circle, leaving the edges free. Wet the edges, fold over, and seal.
8. Bake on parchment paper at 450 degrees for 10 minutes.
9. Remove from oven and eat with yogurt sauce.
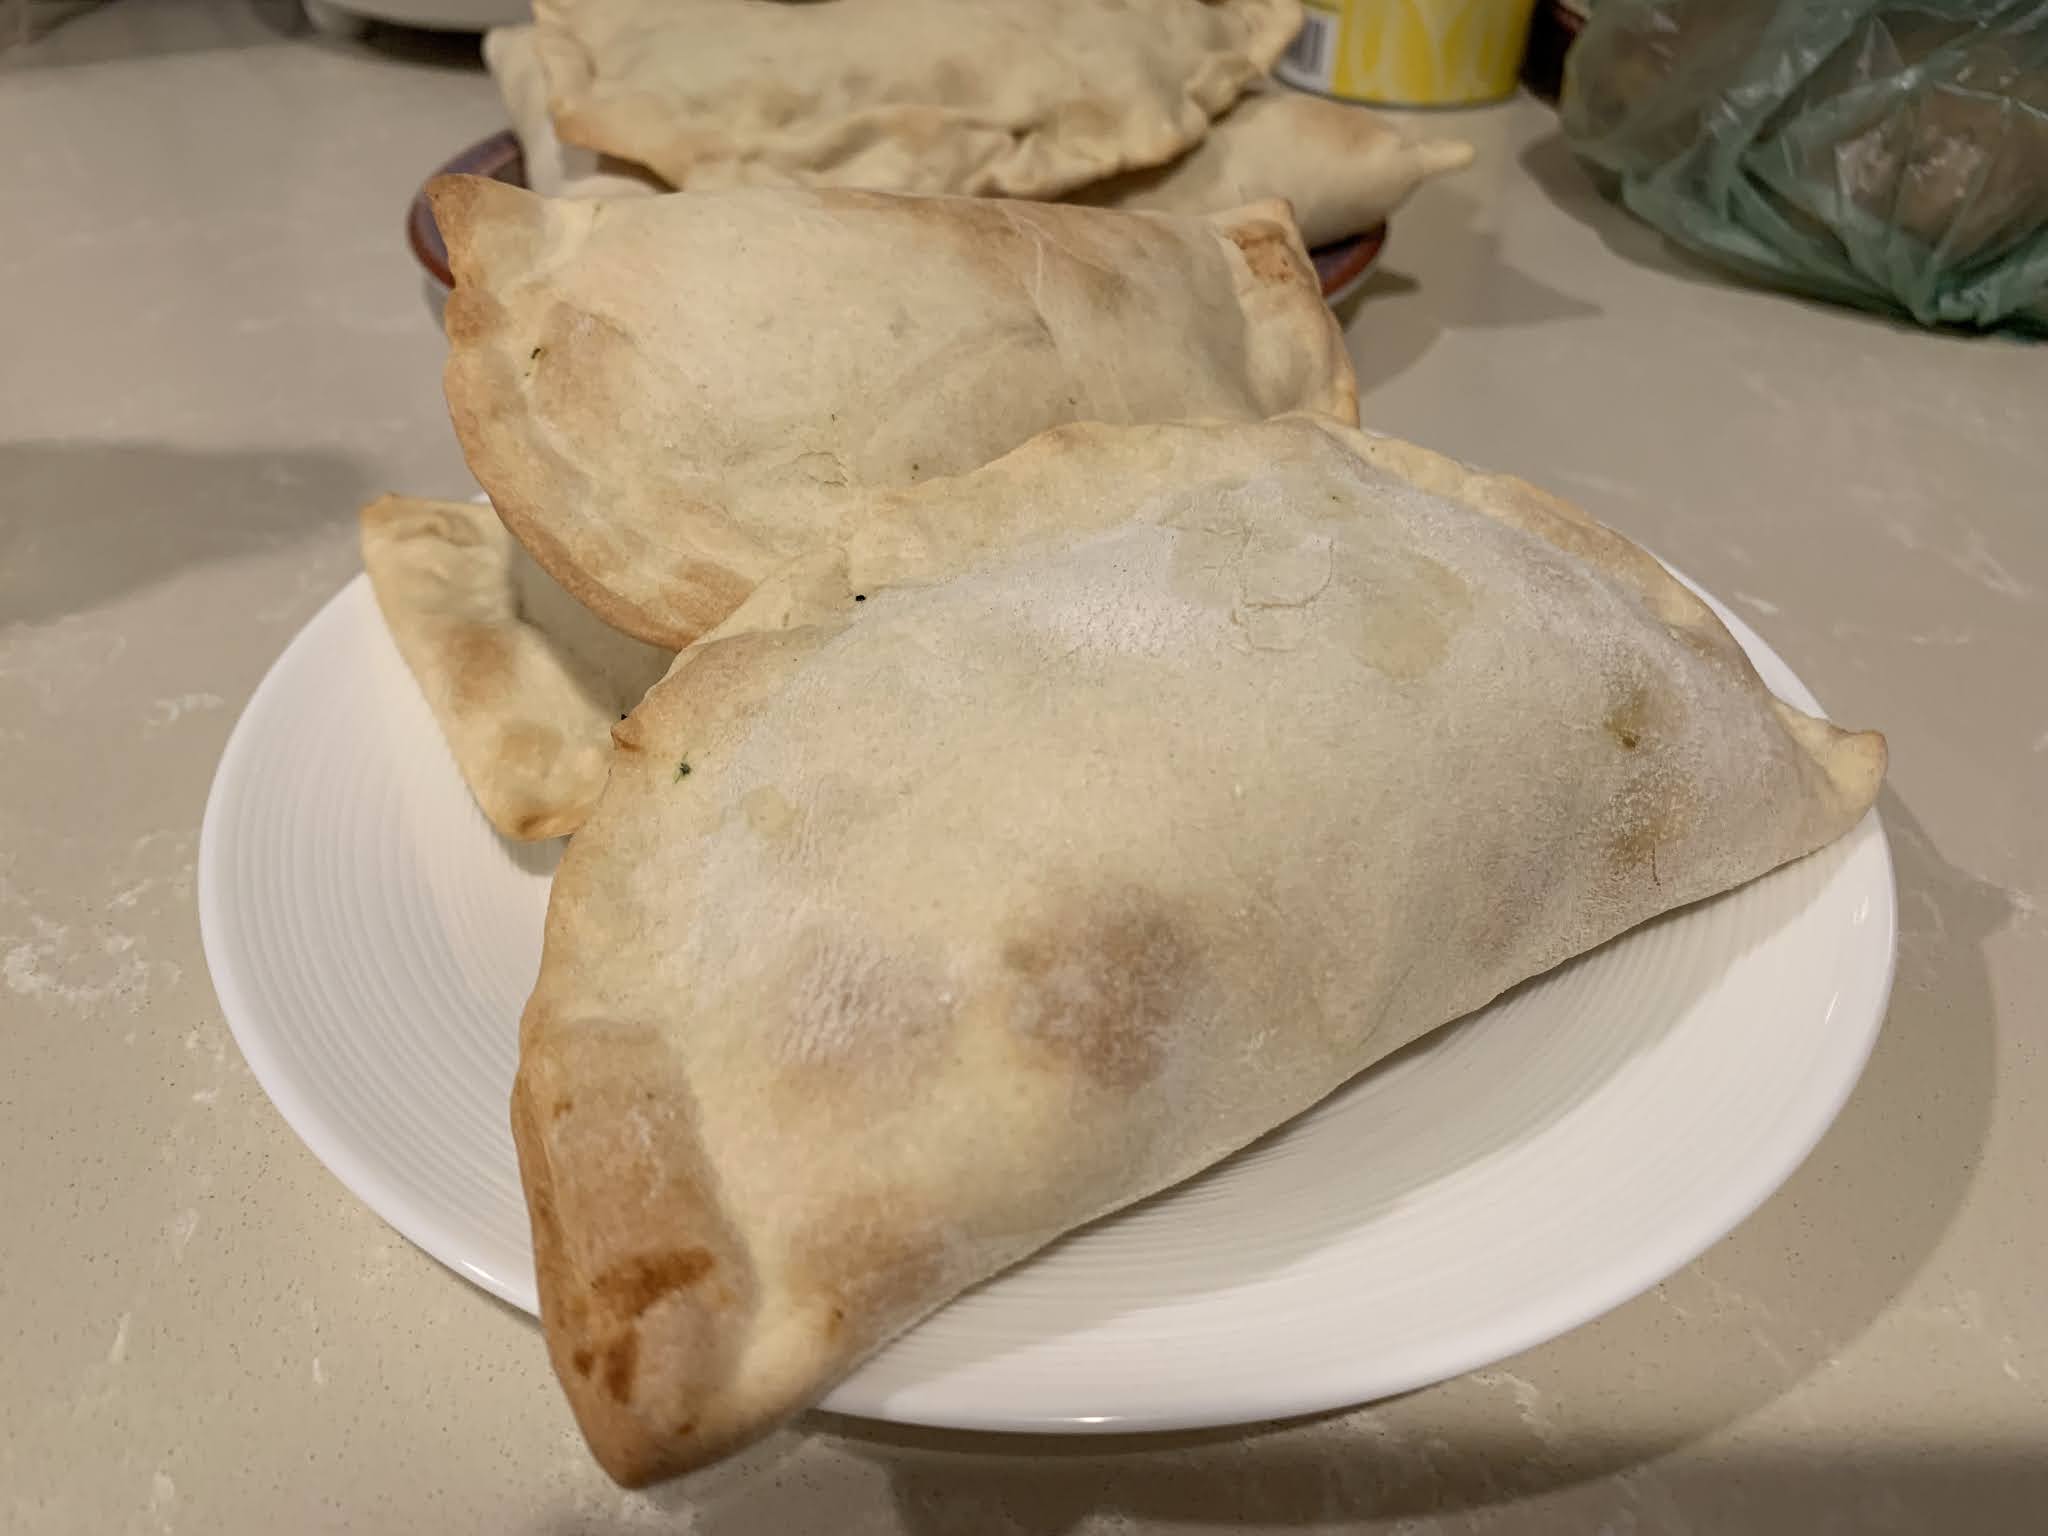
The author had given some baking recommendations to another reader in the comments, noting that it would still not be as good as frying (which I knew and was okay with), so I followed those. That time and temperature yielded a nice crispy crust, and the way they ballooned, they looked like not-that-filled baked empanadas. They were never going to be the same as fried, but they did turn out crispy and crunchy.
As a side note, this was my first time kneading dough and using a rolling pin. I don't know how I made it this many decades without actually doing that. I found the entire process very calming, which was good since we had just bought a pound of yeast at this point in the year. The kneading went well, but the rolling out, not so much. I couldn't make a circle even after 12 tries, and only had a few that were remotely symmetrical. And the reason I had 12 tries was because, even though I used some flour to separate them, I guess I left them too long and the bottom ones all stuck together, so I had to do it over again. Definitely need more practice!
My backup for the bolani was intended to be little mashed potato cakes. I figured I would just take the remaining spinach-potato mixture, make it into little balls, and pan-fry them with some olive oil. A few minutes in, as the mixture started sticking to the pan, I got this unsettling feeling of deja vu. This had definitely happened to me before. I was basically making bubble and squeak, and I remembered how much of a failure that was in the past. (Proof here.) Before more of the potatoes could stick to the pan, I quit that and figured we'd just have a side of spinach mashed potatoes. (Reading over old posts, it seems I did make bubble and squeak work on a second or third attempt, but it would have taken 20+ minutes in the pan, and we didn't have that type of time anyway.)
So, what was the verdict? A little over two hours of work, but I was disappointed (and I don't blame the recipe at all). It was never going to be as good as the bolani in an Afghan restaurant because we weren't frying them, but the whole thing was a little bland. The spinach filling, despite all the seasoning I added to it, seemed to lack flavor, and the dough had no flavor either. I probably should have seasoned it a little since I wasn't going to be frying it, so it wasn't going to pick up the flavor from the frying oil. Generally, there wasn't really anything wrong with how they turned out, but they just felt so lackluster, and meh is the last feeling I want after finally eating something I just spent two hours on. Thank goodness for that yogurt sauce though. It made everything better! As is often my conclusion when I try baking something that comes out really well deep-fried, I think in this case, we'll just leave it to the experts and get these from restaurants.
Apparently I forgot to take a picture of the ingredients (or was in a rush, can't remember), so here's a photo of all the components together
I started with a recipe I found on V for Veggy, and made some adjustments (ingredients, but most notably, baking instead of deep frying). The ingredients we used were:
for the dough:
- 2.5 cups all-purpose flour ($1)
- 1 tsp salt ($0.02)
- 1.5 tsp olive oil ($0.15)
- 1 cup water ($0)
for the dough "process":
- flour for work surface ($0.05)
- olive oil coating for mixing bowl ($0.10)
- small bowl of water for adding to the dough while kneading ($0)
for the filling:
- 2 russet potatoes ($1)
- 6 scallions ($0.65)
- 1/2 bag frozen spinach ($0.75)
- ground coriander ($0.15)
- garlic powder ($0.05)
- ground cumin ($0.15)
- salt and pepper ($0.05)
for the yogurt sauce:
- 1 cup plain Greek yogurt ($1.38)
- a lot of garlic powder ($0.10)
- a little salt ($0.02)
- small batch of mint (about 1/3 cup chopped) ($1)
One thing I will say about this recipe was that it was very budget-friendly. Dinner for the three of us was approximately $6.62. We haven't seen a challenge meal come out that affordable in a long time.
Making the dough
This was a labor-intensive recipe, which I knew going into it. I figured it would take at least 1.5-2 hours. Unfortunately, we got a late start, and it did edge slightly over the 2 hour mark, but considering how slow my pace usually is, it was better than it could have been. The steps for making the baked bolani were:
1. Combine ingredients for dough in large bowl.
2. Knead dough until it's soft, smooth, and not sticky. [The recipe had really good time estimates here, and was exactly right that it would take 10 minutes. I would periodically wet my fingers to add a little more water to the dough when kneading, so it was probably a little more than a cup of water in the end.]
Ready to proof
3. Coat the mixing bowl with olive oil, and cover dough with a wet towel. Proof for an hour.
4. While dough is proofing, prep potatoes (peel, chop, boil, and mash), chop scallions, and chop mint.
5. Make yogurt sauce while potatoes are cooking by combining all ingredients. Chill until ready to eat.
Mashed potato filling
6. Make mashed potatoes by combining all ingredients for filling and seasoning to taste.
7. Divide dough into 8 portions, roll out into large circles on a floured work surface, and spread the filling on half of the circle, leaving the edges free. Wet the edges, fold over, and seal.
Those are not circles. Not even close
8. Bake on parchment paper at 450 degrees for 10 minutes.
9. Remove from oven and eat with yogurt sauce.
Final product
The author had given some baking recommendations to another reader in the comments, noting that it would still not be as good as frying (which I knew and was okay with), so I followed those. That time and temperature yielded a nice crispy crust, and the way they ballooned, they looked like not-that-filled baked empanadas. They were never going to be the same as fried, but they did turn out crispy and crunchy.
As a side note, this was my first time kneading dough and using a rolling pin. I don't know how I made it this many decades without actually doing that. I found the entire process very calming, which was good since we had just bought a pound of yeast at this point in the year. The kneading went well, but the rolling out, not so much. I couldn't make a circle even after 12 tries, and only had a few that were remotely symmetrical. And the reason I had 12 tries was because, even though I used some flour to separate them, I guess I left them too long and the bottom ones all stuck together, so I had to do it over again. Definitely need more practice!
This is how things are shaped when you can't roll out even circles
My backup for the bolani was intended to be little mashed potato cakes. I figured I would just take the remaining spinach-potato mixture, make it into little balls, and pan-fry them with some olive oil. A few minutes in, as the mixture started sticking to the pan, I got this unsettling feeling of deja vu. This had definitely happened to me before. I was basically making bubble and squeak, and I remembered how much of a failure that was in the past. (Proof here.) Before more of the potatoes could stick to the pan, I quit that and figured we'd just have a side of spinach mashed potatoes. (Reading over old posts, it seems I did make bubble and squeak work on a second or third attempt, but it would have taken 20+ minutes in the pan, and we didn't have that type of time anyway.)
So, what was the verdict? A little over two hours of work, but I was disappointed (and I don't blame the recipe at all). It was never going to be as good as the bolani in an Afghan restaurant because we weren't frying them, but the whole thing was a little bland. The spinach filling, despite all the seasoning I added to it, seemed to lack flavor, and the dough had no flavor either. I probably should have seasoned it a little since I wasn't going to be frying it, so it wasn't going to pick up the flavor from the frying oil. Generally, there wasn't really anything wrong with how they turned out, but they just felt so lackluster, and meh is the last feeling I want after finally eating something I just spent two hours on. Thank goodness for that yogurt sauce though. It made everything better! As is often my conclusion when I try baking something that comes out really well deep-fried, I think in this case, we'll just leave it to the experts and get these from restaurants.
Tuesday, December 22, 2020
Week 48 - Gourds
When I think of gourds, what comes to mind first are mostly decorative and ornamental gourds, so I wasn't sure what to do for this challenge. Then I remembered that things like butternut squash would qualify, so I went off to research what other gourds I could cook with, since breaking down a butternut squash is not among my favorite activities. A list on Lifehacker ranked edible gourds with some preparation tips, which was super helpful and led me to what I ended up making - delicata squash!
One of the reasons people love delicata squash is that you don't have to peel it unlike a lot of other squash. The skin is edible, and it's supposed to get really soft when you roast it. It was soft enough to eat, but it turned out a little dry and crunchy, so I pulled it off of B's pieces. I made sure there was oil on all of the skin parts, so I'm not sure how to get it any softer in the future. (Any ideas, let us know!)
I think I've eaten delicata squash once or twice, not 100% sure, but I've never cooked it before. After surveying a bunch of different sites, it seemed that the most common and foolproof way to make it was to roast it in the oven. The ingredients for our delicata squash experiment were:
To make the squash, I cut them in half lengthwise, scooped out the seeds and stringy parts (harder than I thought it would be and not all the stringy parts came off, but in retrospect, guess I didn't need to be that precise), chopped them into half moon shapes, and then covered them with olive oil, salt, and pepper. Into the oven they went at 425 degrees for 25 minutes (swapping locations on the oven racks 15 minutes in).
- 2 delicata squash ($3.25)
- Spanish olive oil ($0.30)
- salt and pepper ($0.05)
It was a late dinner, but I didn't start that late. Still haven't changed the time on the rice cooker yet...
The squash portion cost about $3.60, and we paired it with some Trader Joe's microwavable mashed potatoes (not sure how much the bag cost, so probably another dollar) and Gardein's vegan 7-grain crispy chick'n tenders ($4.79). Dinner came out to approximately $9.39, which was not bad for three people, especially considering the bulk of the price was the pre-made Gardein tenders.
As far as taste, it turned out delicious with the simple olive oil, salt, and pepper seasoning. We were really happy with the squash, which was good because we had so much of it. I don't know why, but I always pictured delicata squash as smaller than the ones we got, which is why I got two. It turned out to be the right amount for us to get two squash, and we did finish it all, but it filled our entire oven on its two trays, leaving no room for anything else and meaning the chick'n had to be made after the squash, leading to a late dinner. The whole meal worked though, and I would definitely do this again!
Monday, December 21, 2020
Kung Pao Chicken Mochi Balls
We don't often post more than once a day, but with 10 days left to the end of the year, we still have about 17 more posts on the 52 week cooking challenge, all the posts from two different geographic locations in the Around the World Cooking Challenge, and lots of other WorldEats and Trader Joe's posts we just haven't gotten to yet, besides the usual year-end round-ups. Going to post as much as we can to try to preserve as many memories as possible and wrap up the year!
Subscribe to:
Posts (Atom)